Blesta
Integration created in house by Timothy.
Plugin Installation
To install the plugin simply download the plugin from: https://github.com/ticaga/ticaga_blesta
Upload the ticaga_support folder to the plugins folder inside your Blesta installation.
Afterwards head over to the Blesta admin and go to the Settings, click on Plugins, and Available. Hit on Install and you'll be greeted with the following:

Click on Manage to set-up the API:
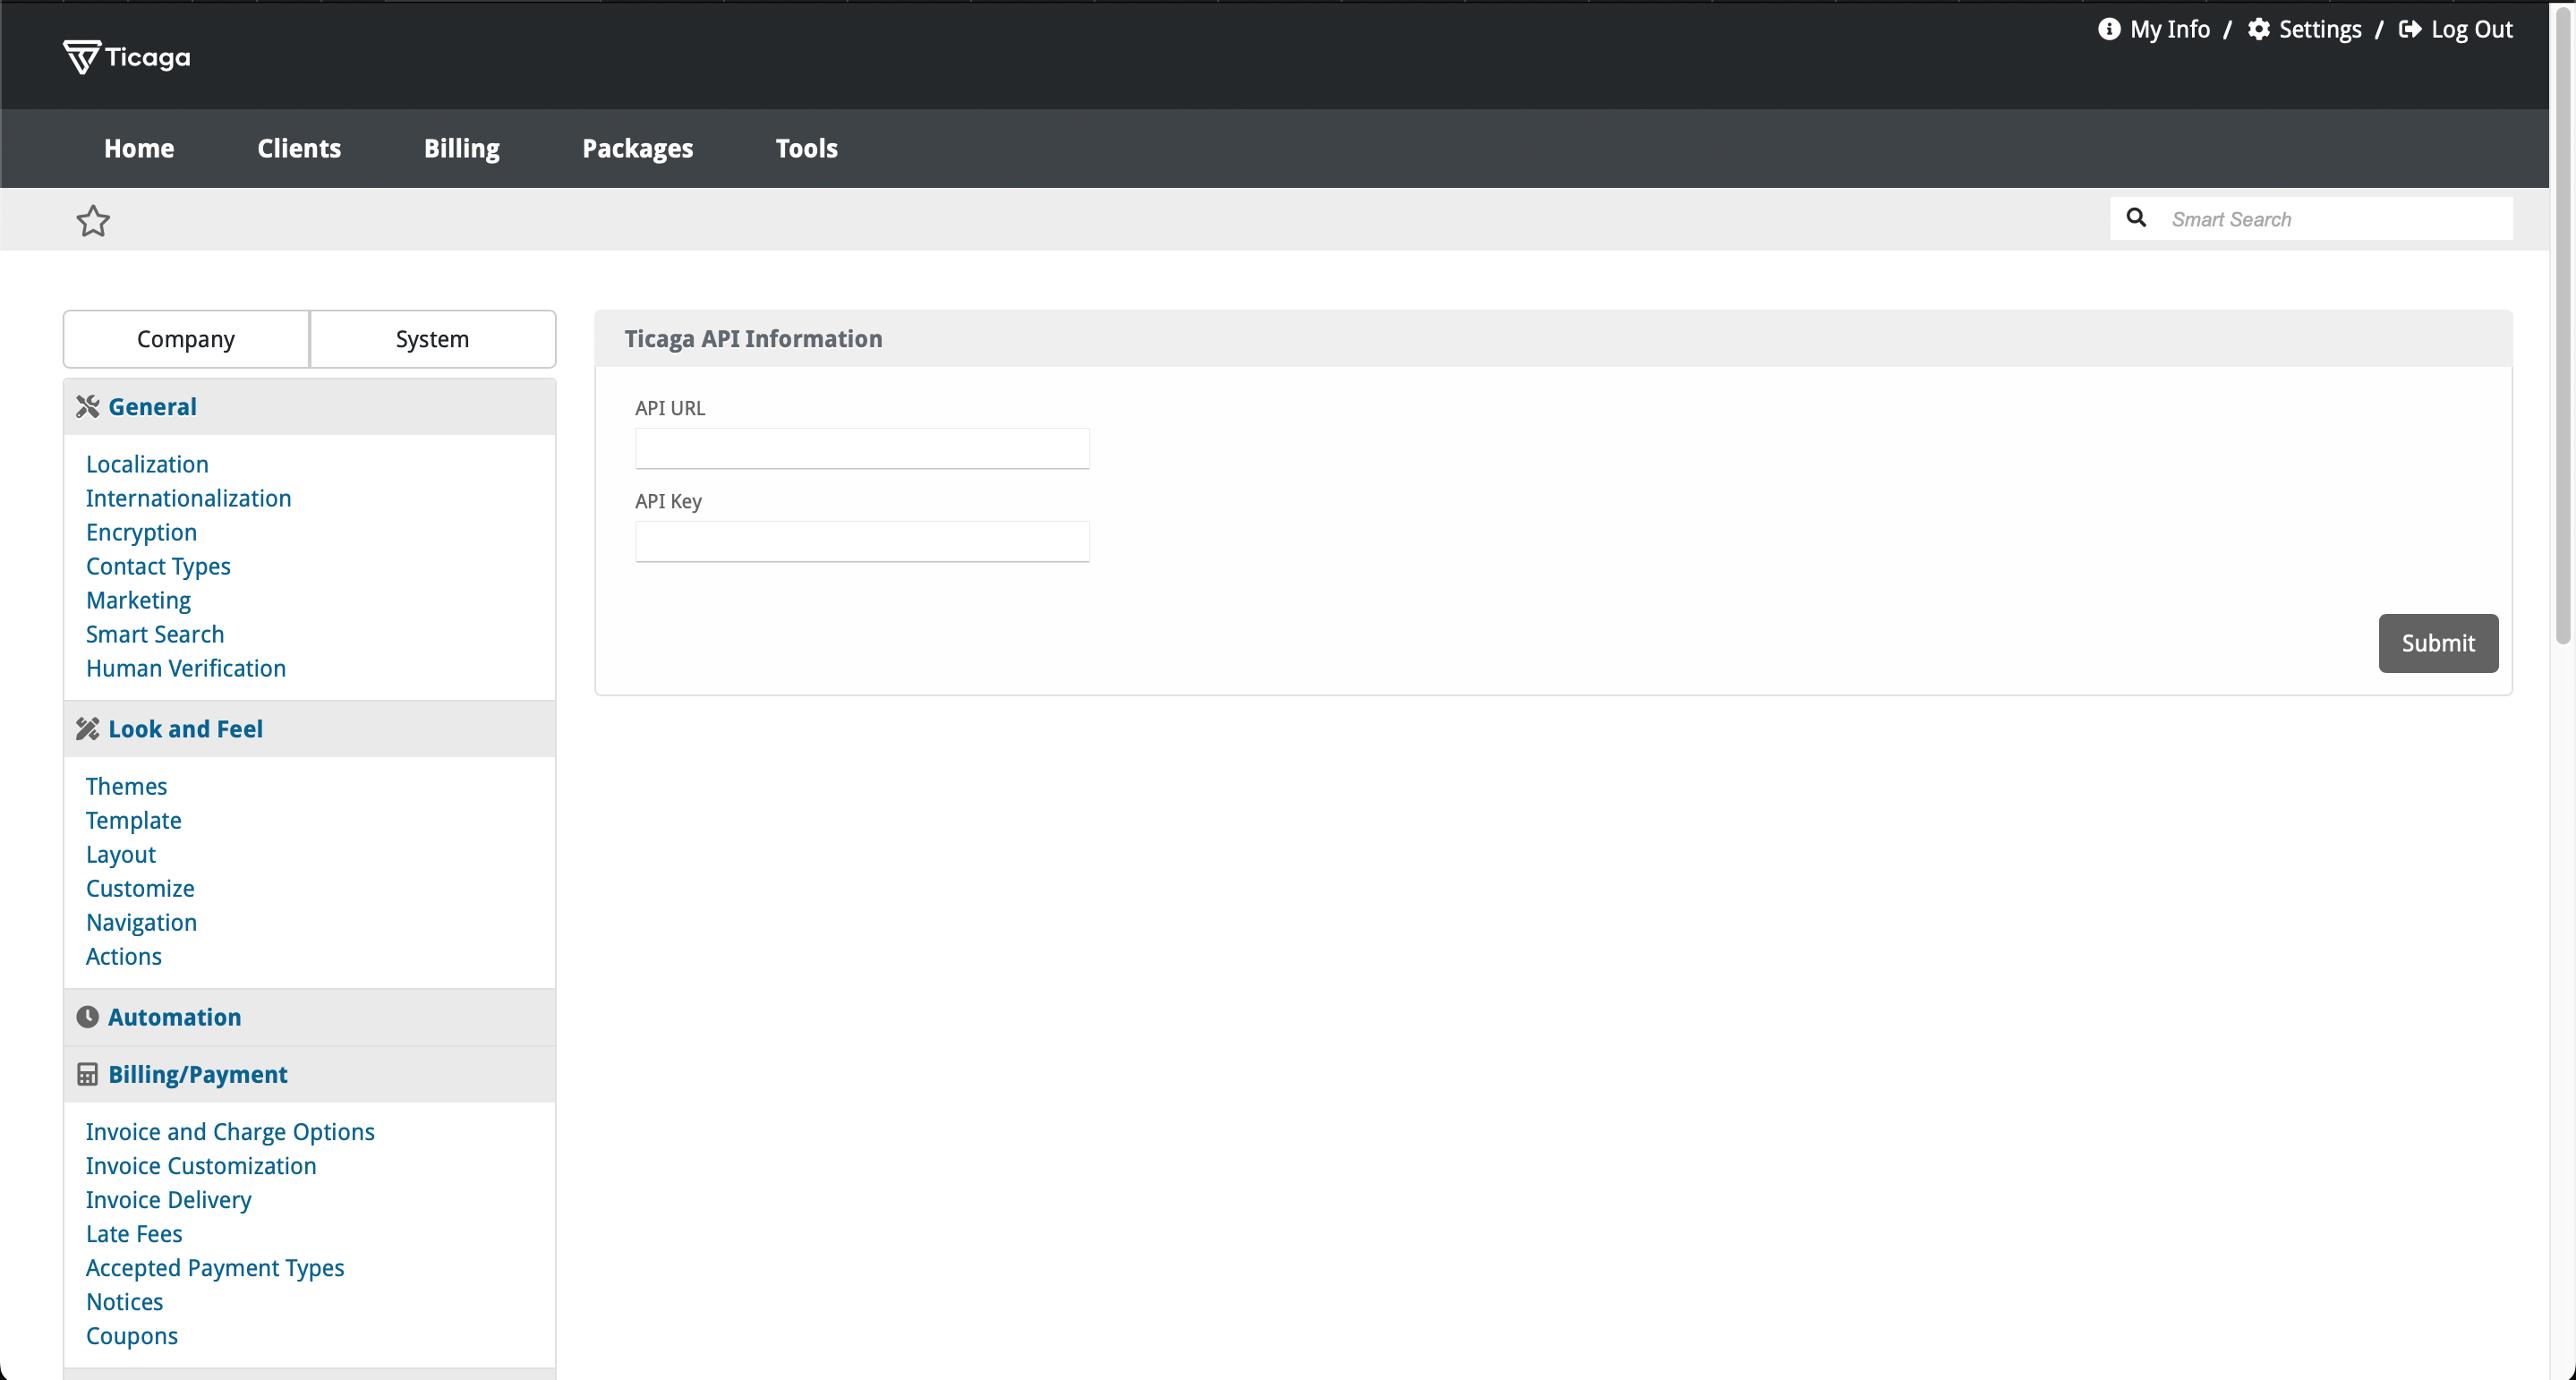
The API URL is your Ticaga installation link, for example https://support.ticaga.com.
The Admin Email Address is your admin email address for Ticaga.
The API Key is the api key you can grab from Ticaga, simply log into your Ticaga installation, click on your name in the bottom left, select on Settings then select API Details.

The Email is your Admin Email Address.
The Token is your API Key.
If you don't have one, click on Create a Token to generate a new one.
Portal Link
Want something like ours:
Simply add this to your Portal plugin on Blesta: Settings > Company > Plugins > Portal: manage and add this:
{% if plugins.ticaga_support.enabled %}
    <div class="col-md-4 col-sm-6 portal-box">
        <a href="{blesta_url}plugin/ticaga_support/client_main/departments/">
            <div class="card">
                <div class="card-body">
                    <i class="fas fa-ticket-alt fa-4x"></i>
                    <h4>Support</h4>
                    <p>You can open a trouble ticket here.</p>
                </div>
            </div>
        </a>
    </div>
{% endif %}
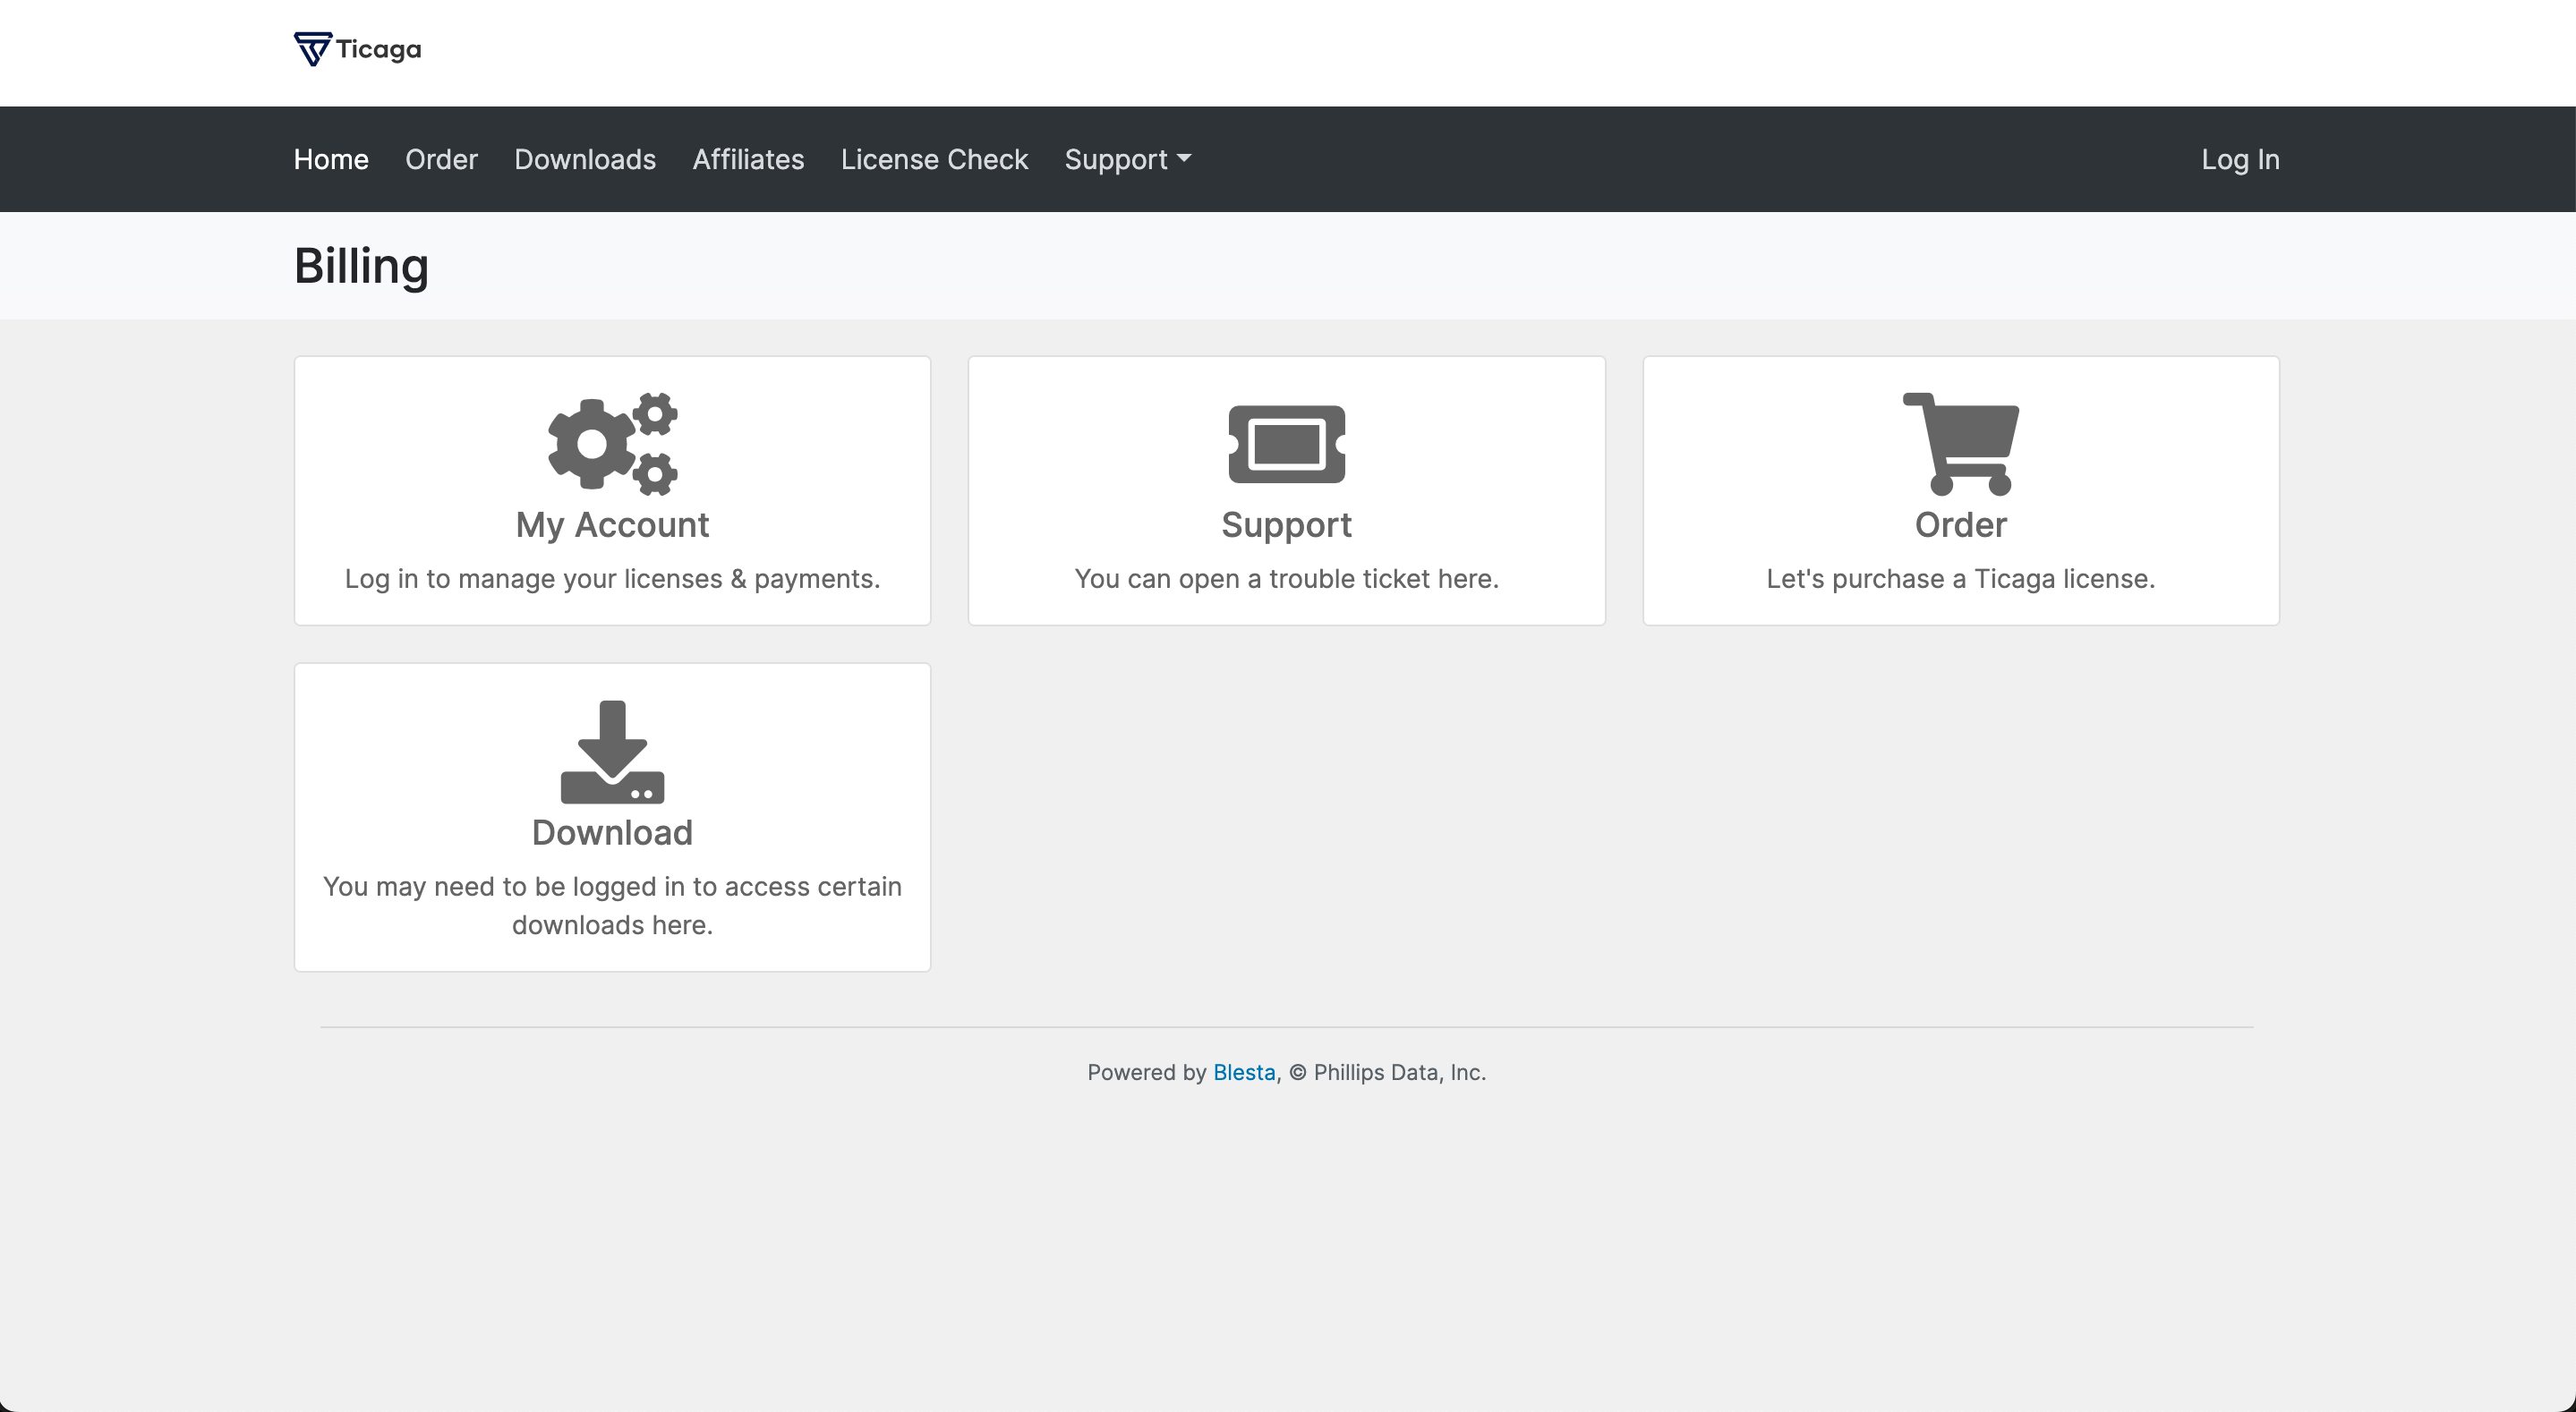
How Clients can open a ticket.
To open tickets on Blesta, your customers need to sync their Ticaga account to Blesta.
Simply clicking on Support shows this page:
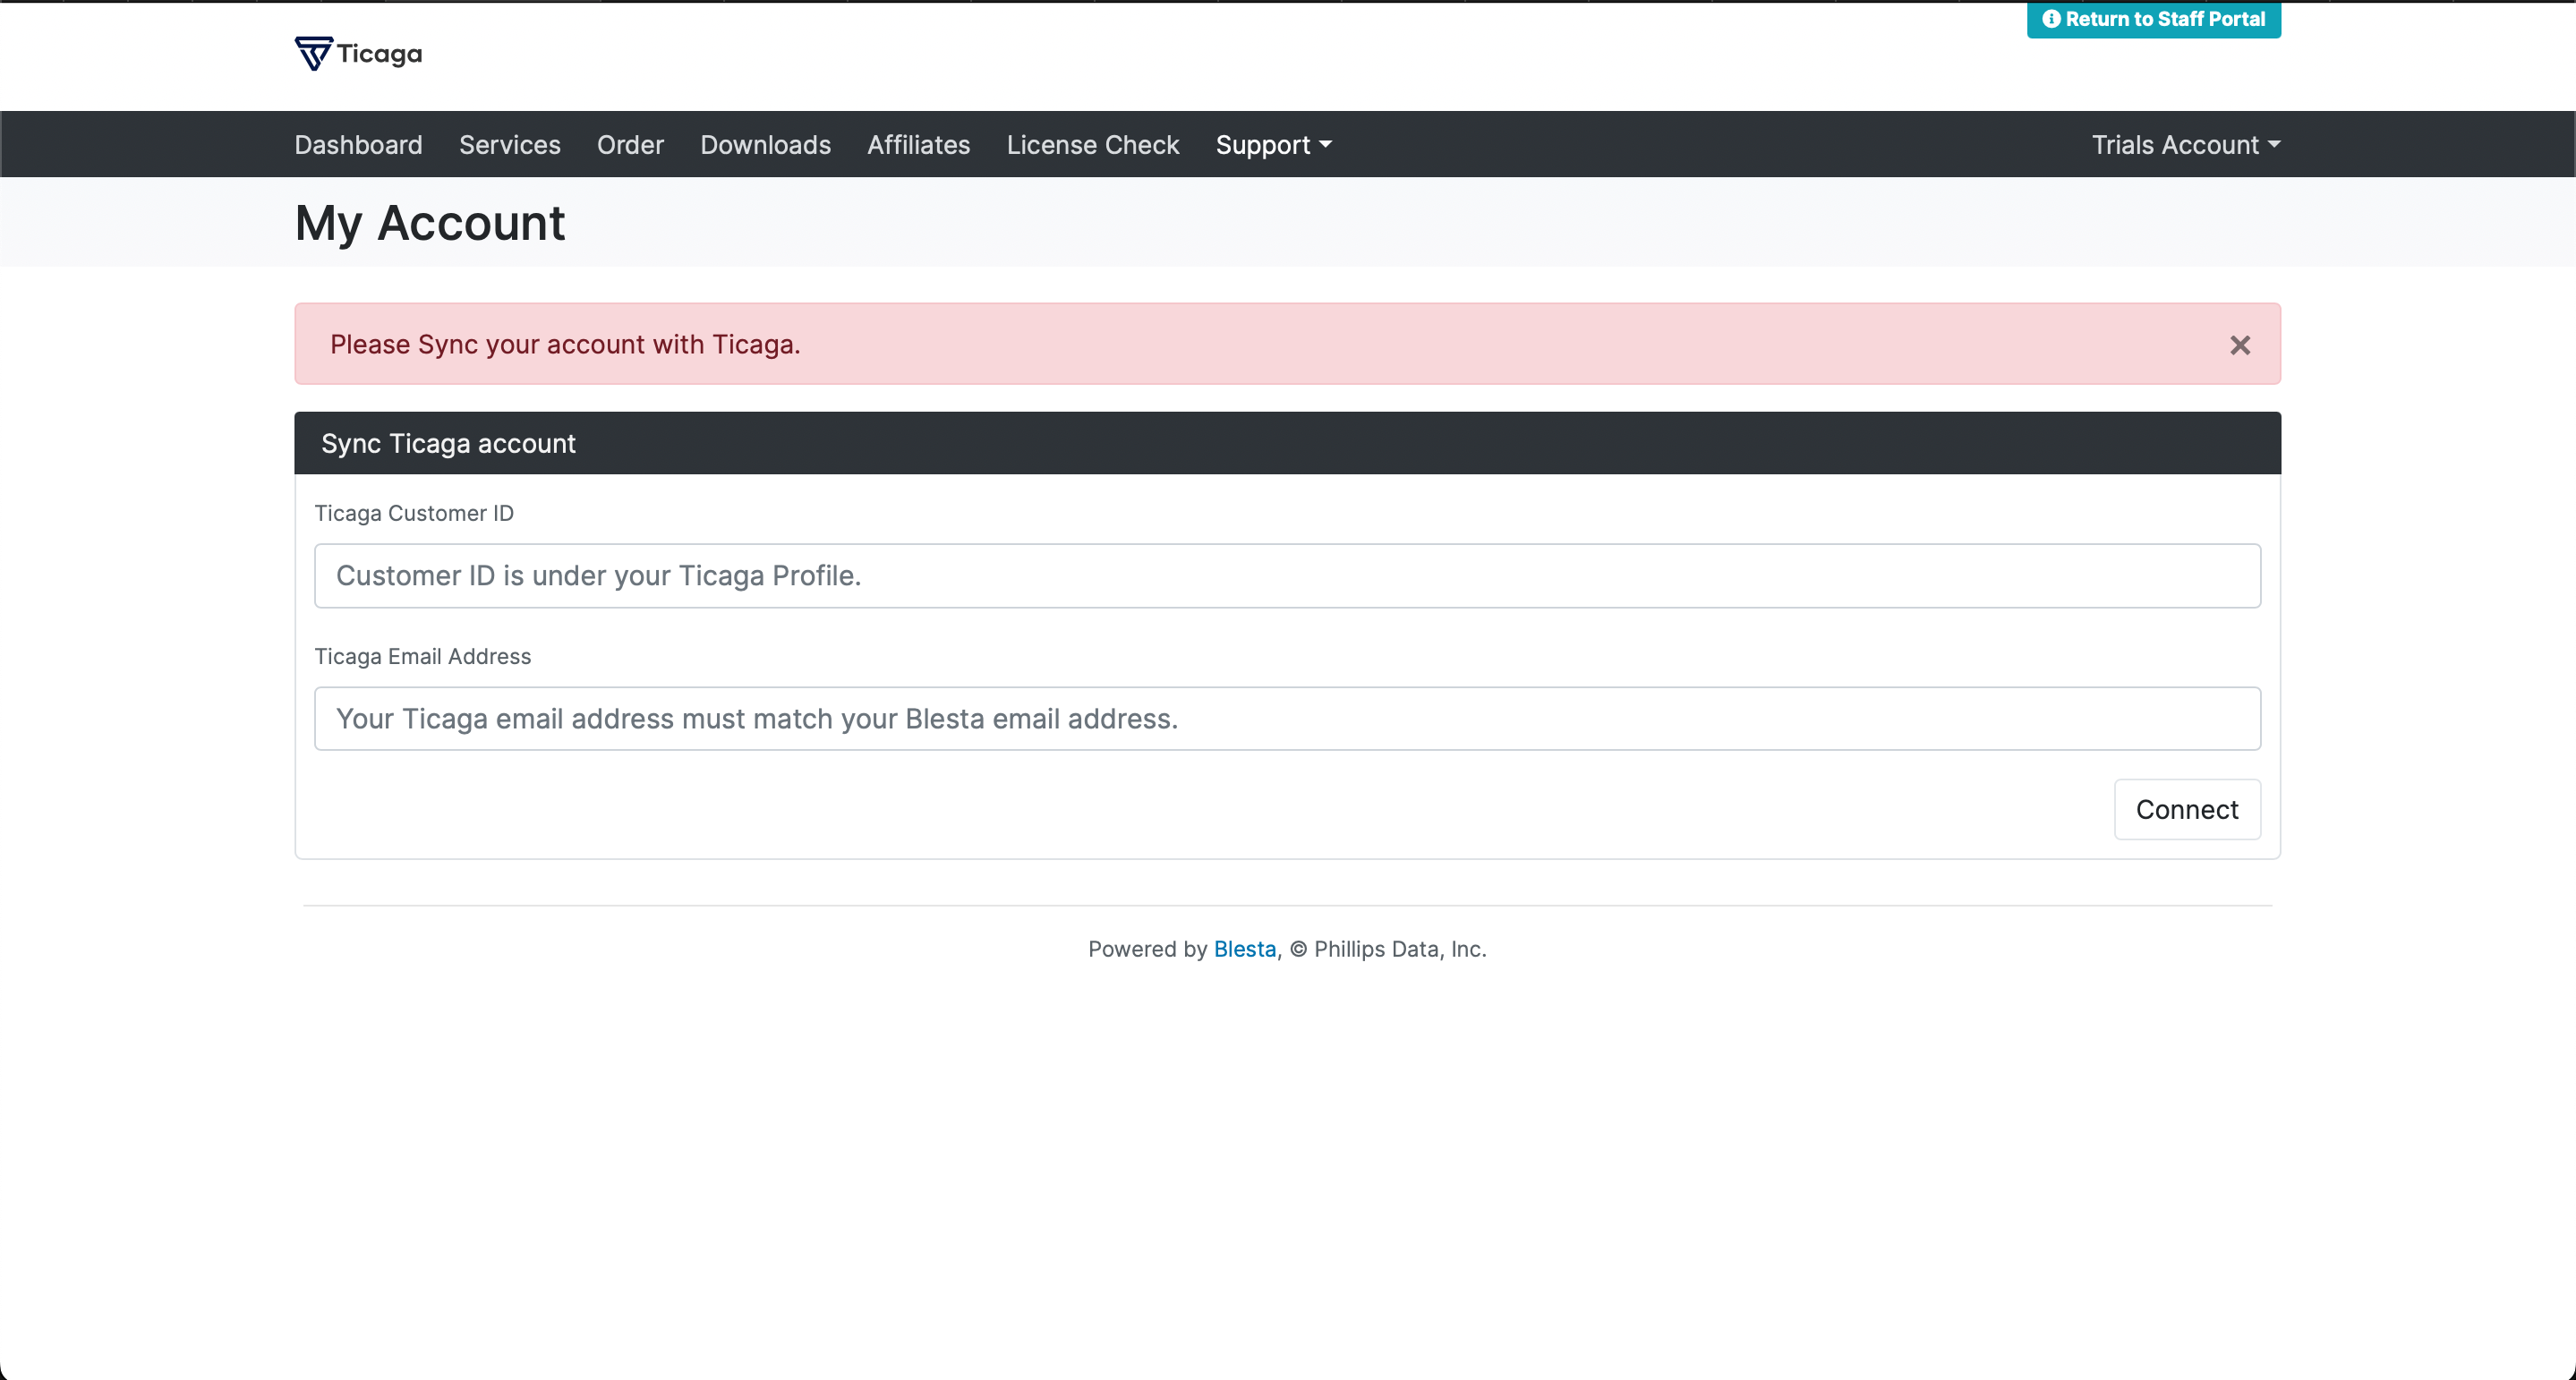
Your customers can find their customer ID on Ticaga by clicking their name on the bottom left:
Their Ticaga email address must match their Blesta email address else the syncing will not work.
We've got two tasks to help make this more streamlined: Blesta Plugin - Automatically Sync & Blesta Plugin - Sync Manually.
No ETA yet, on these but we do have these planned, if it will benefit you, please +1 them so we know we may need to do them sooner rather than later.
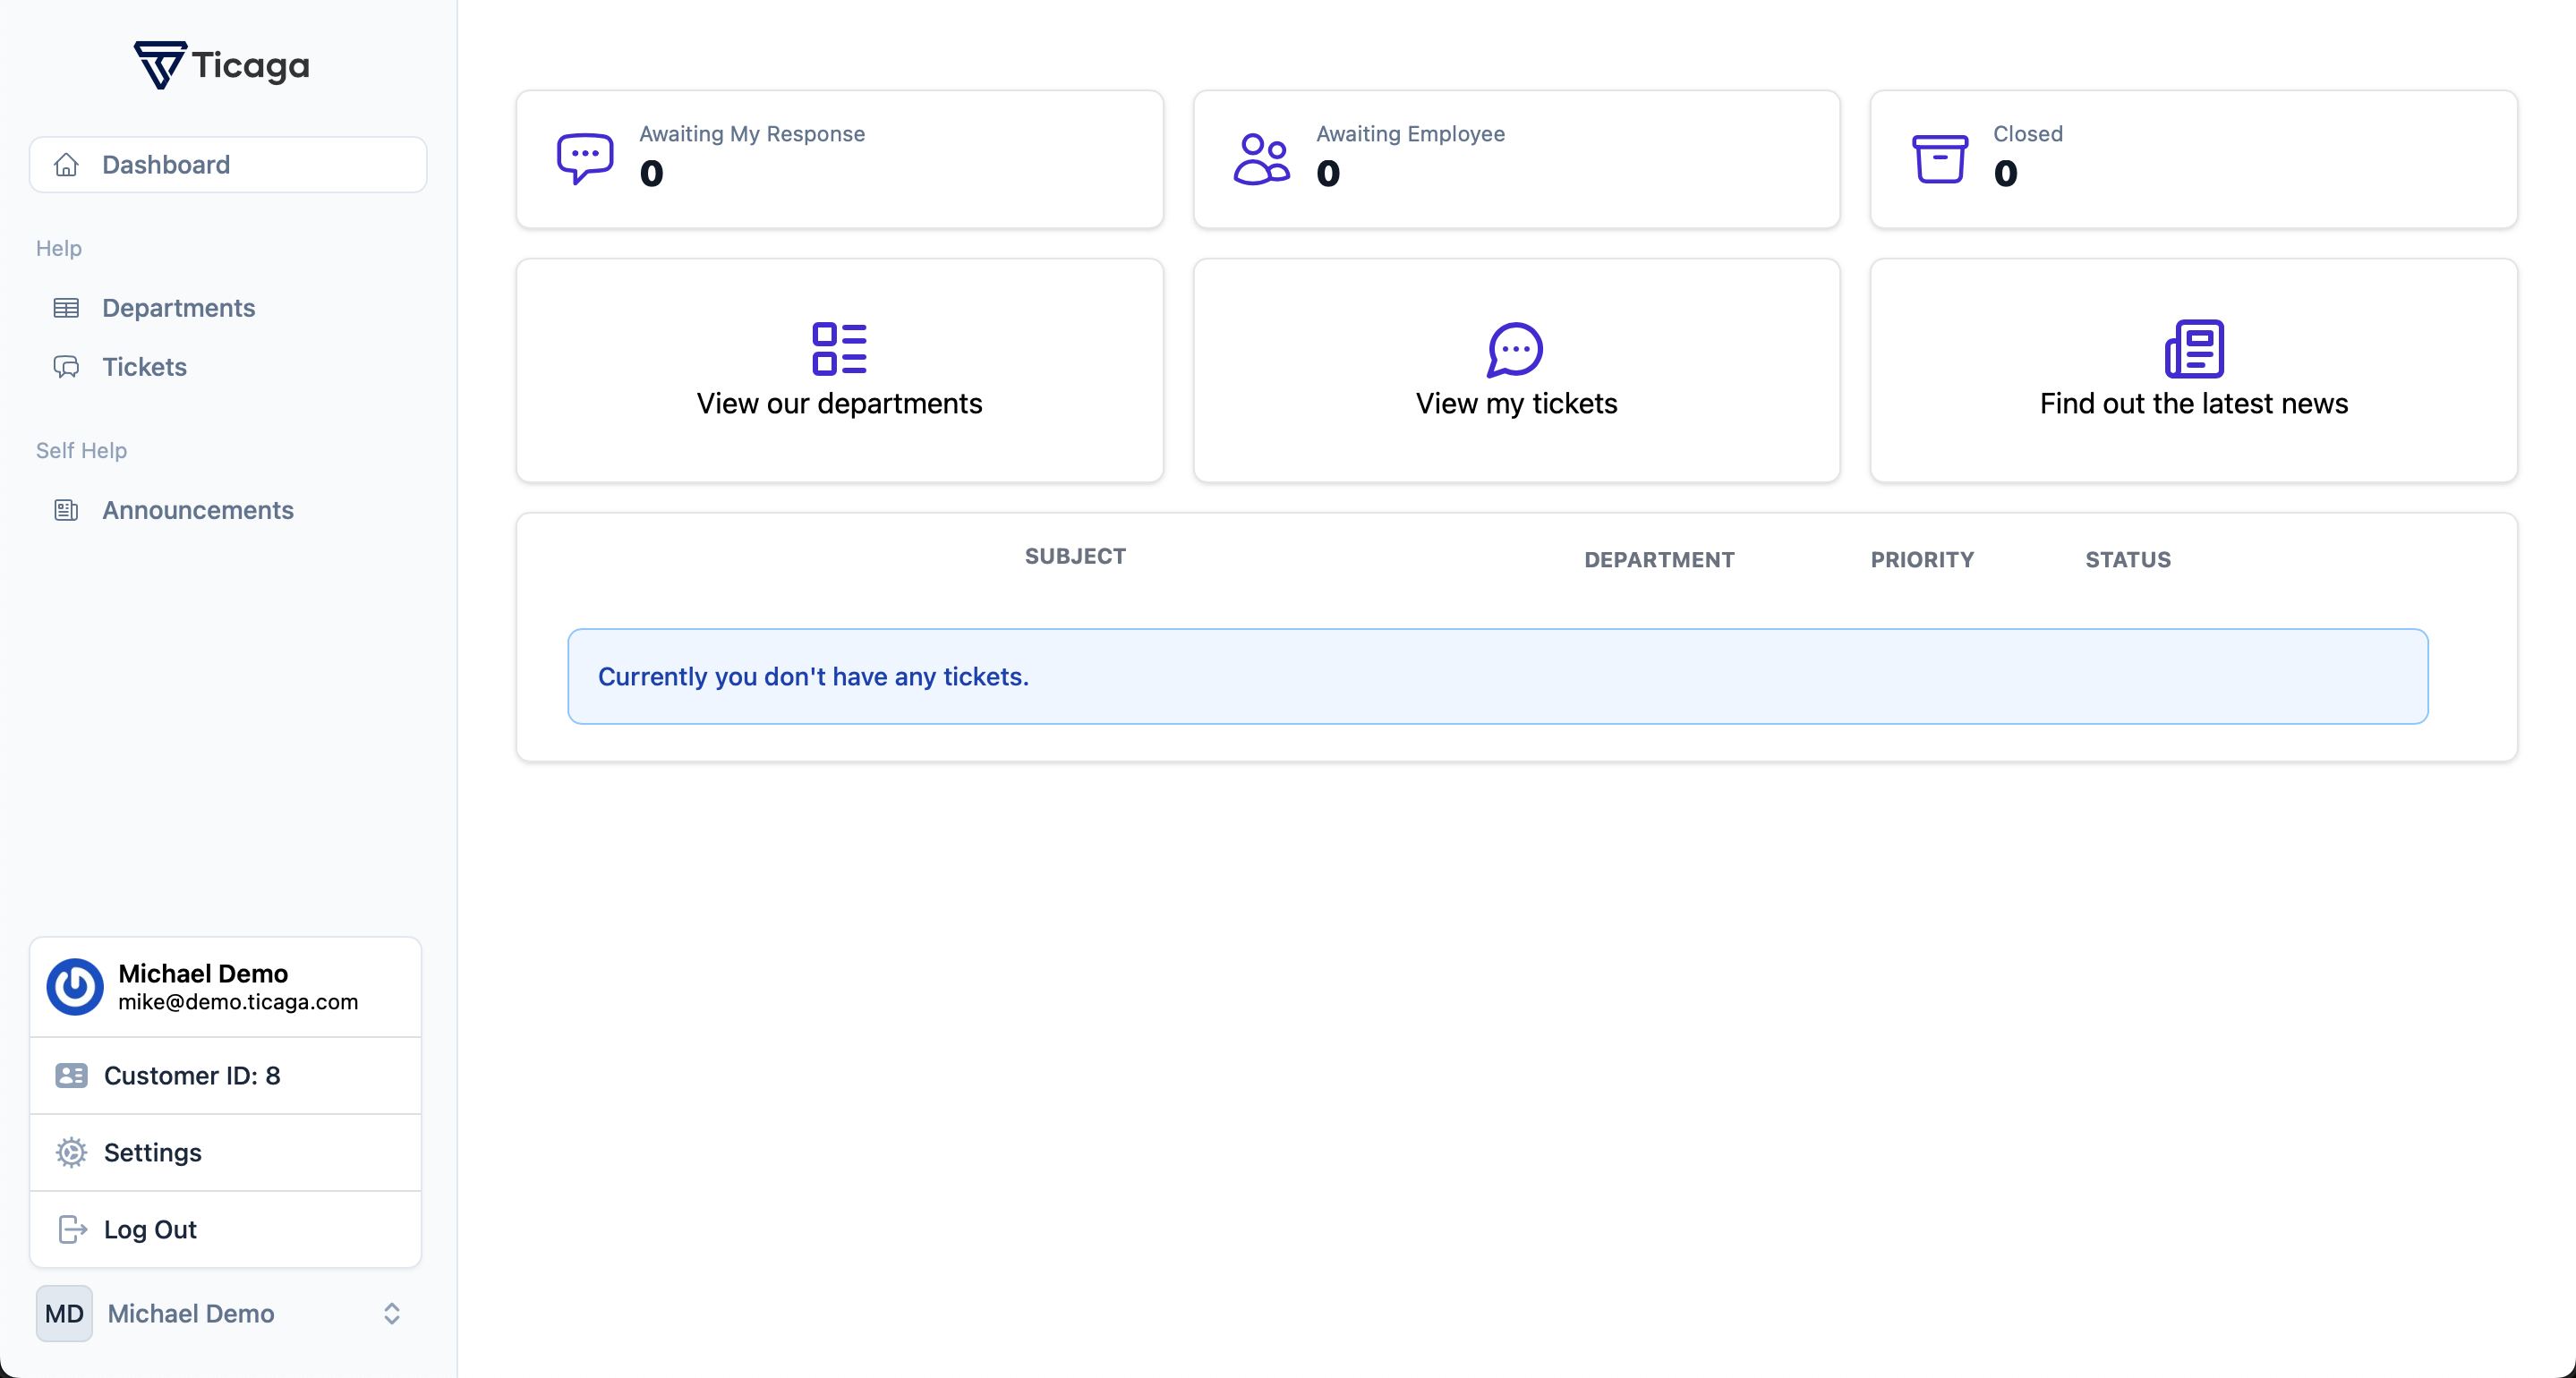
After your customer has provided the following details they'll be shown this page:

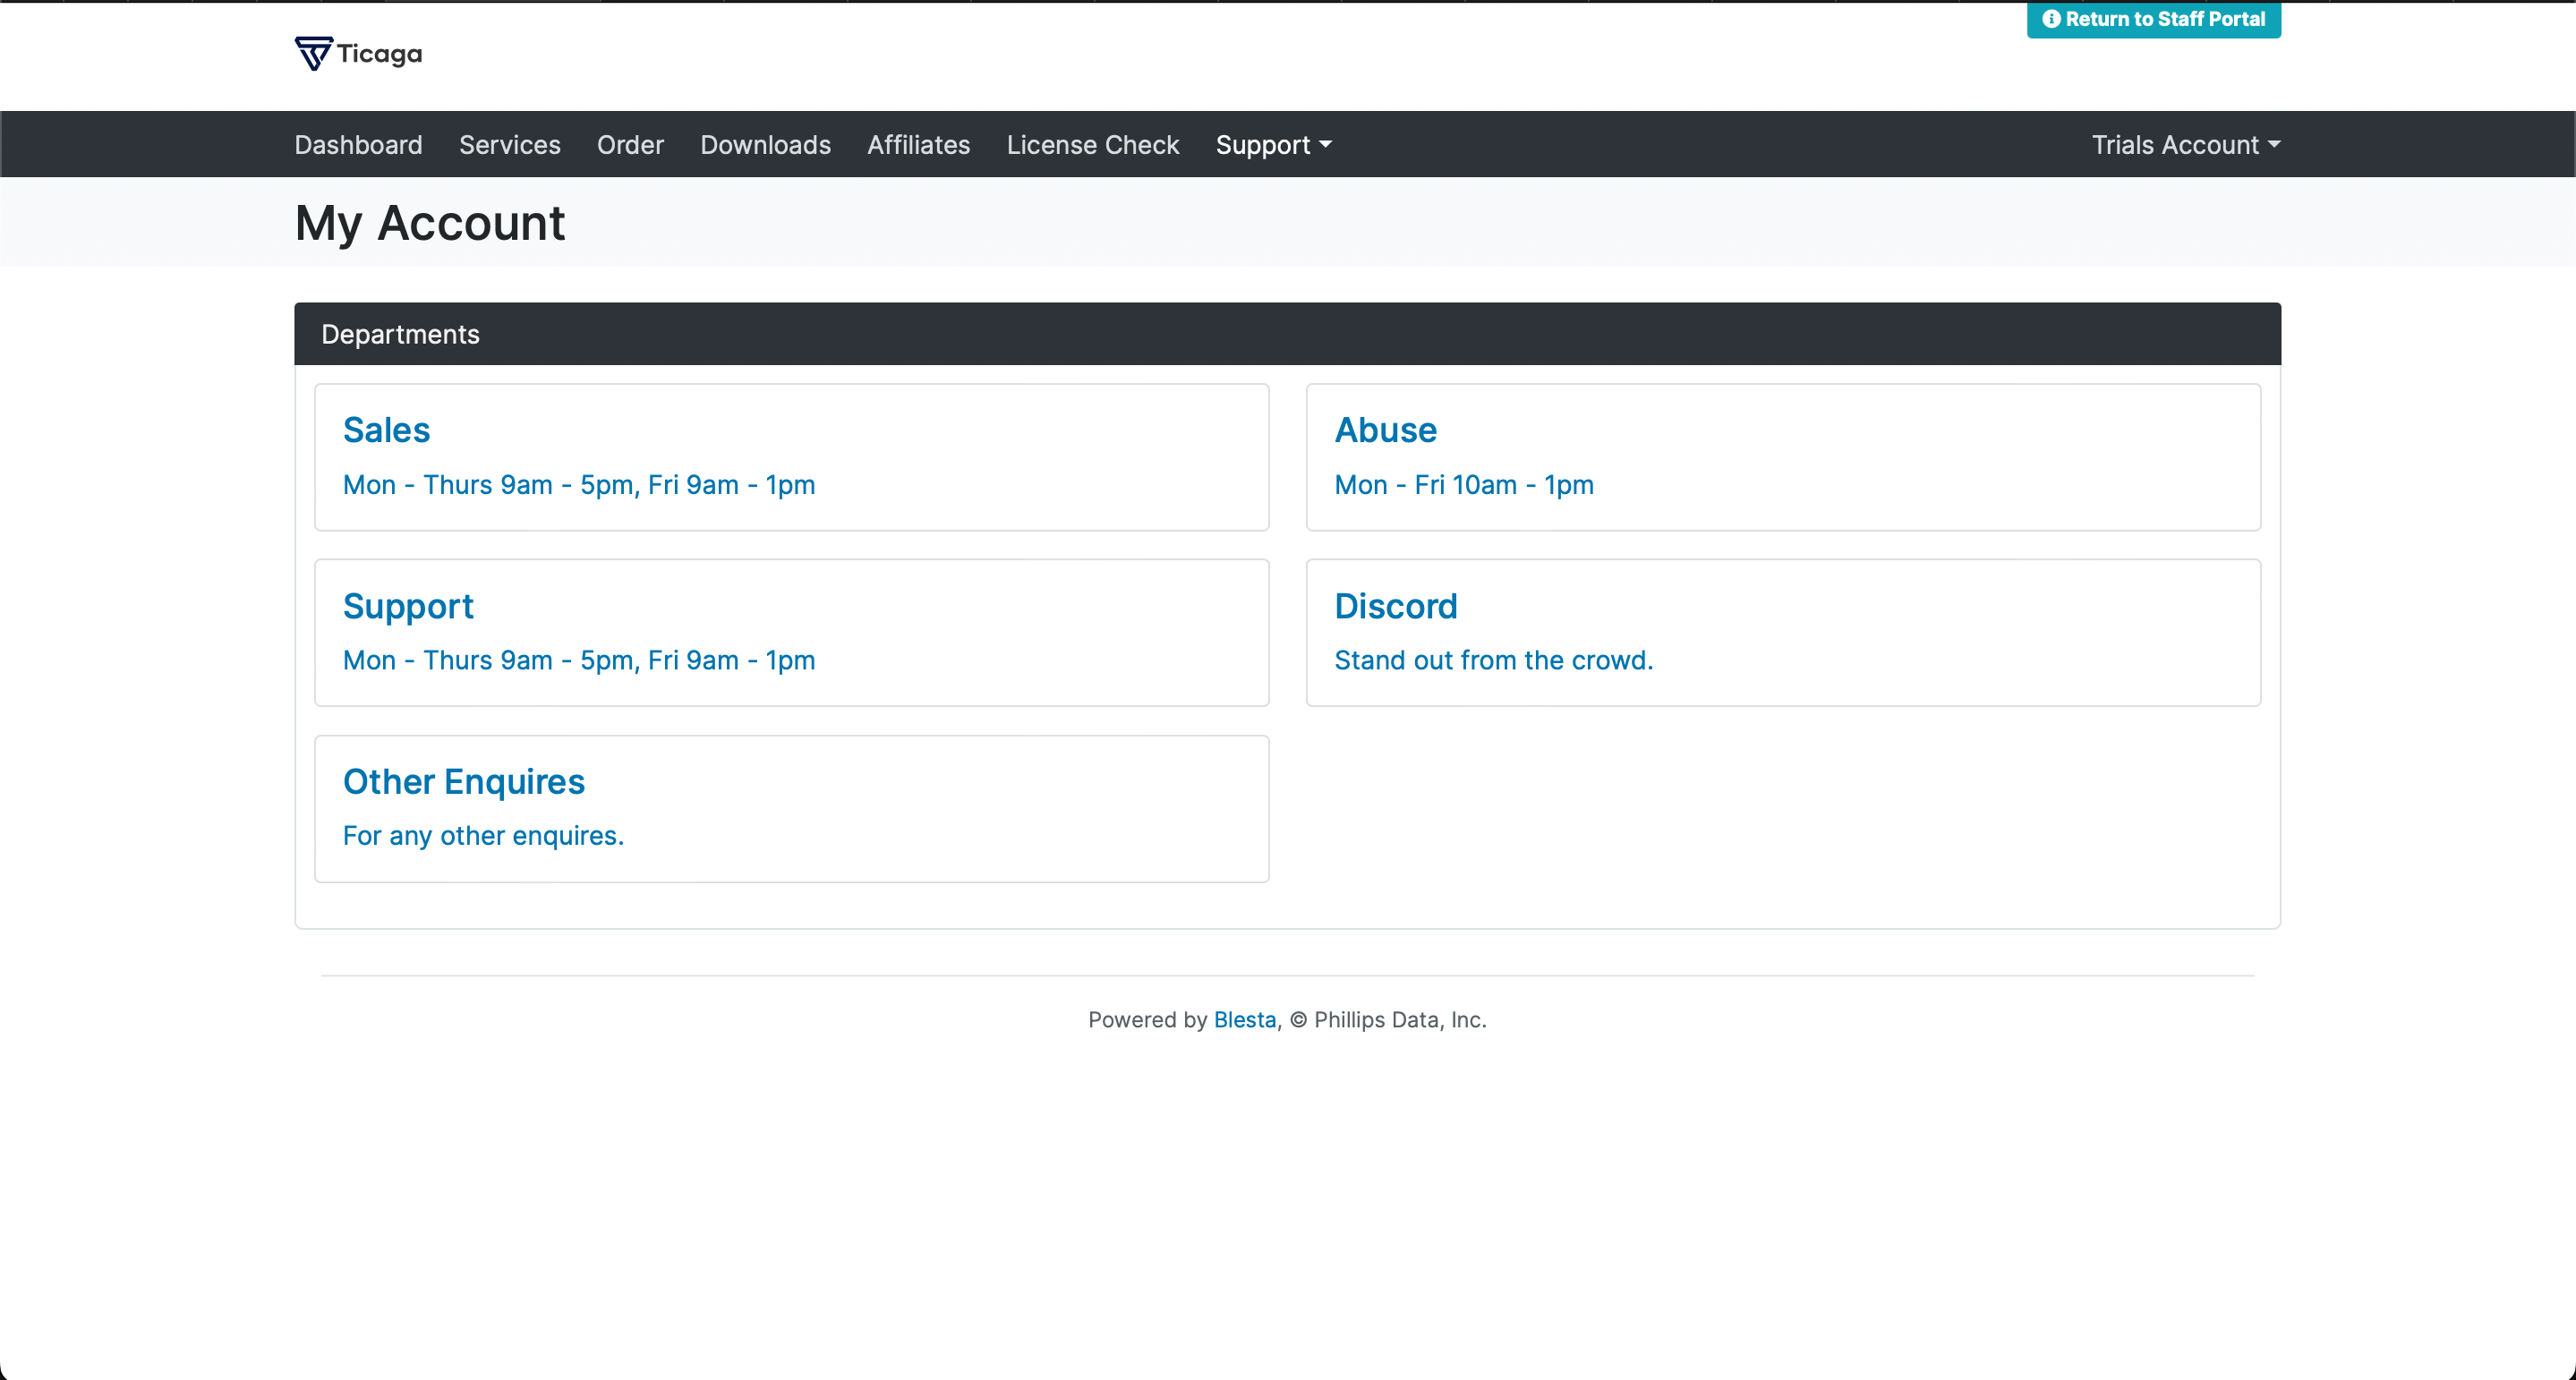
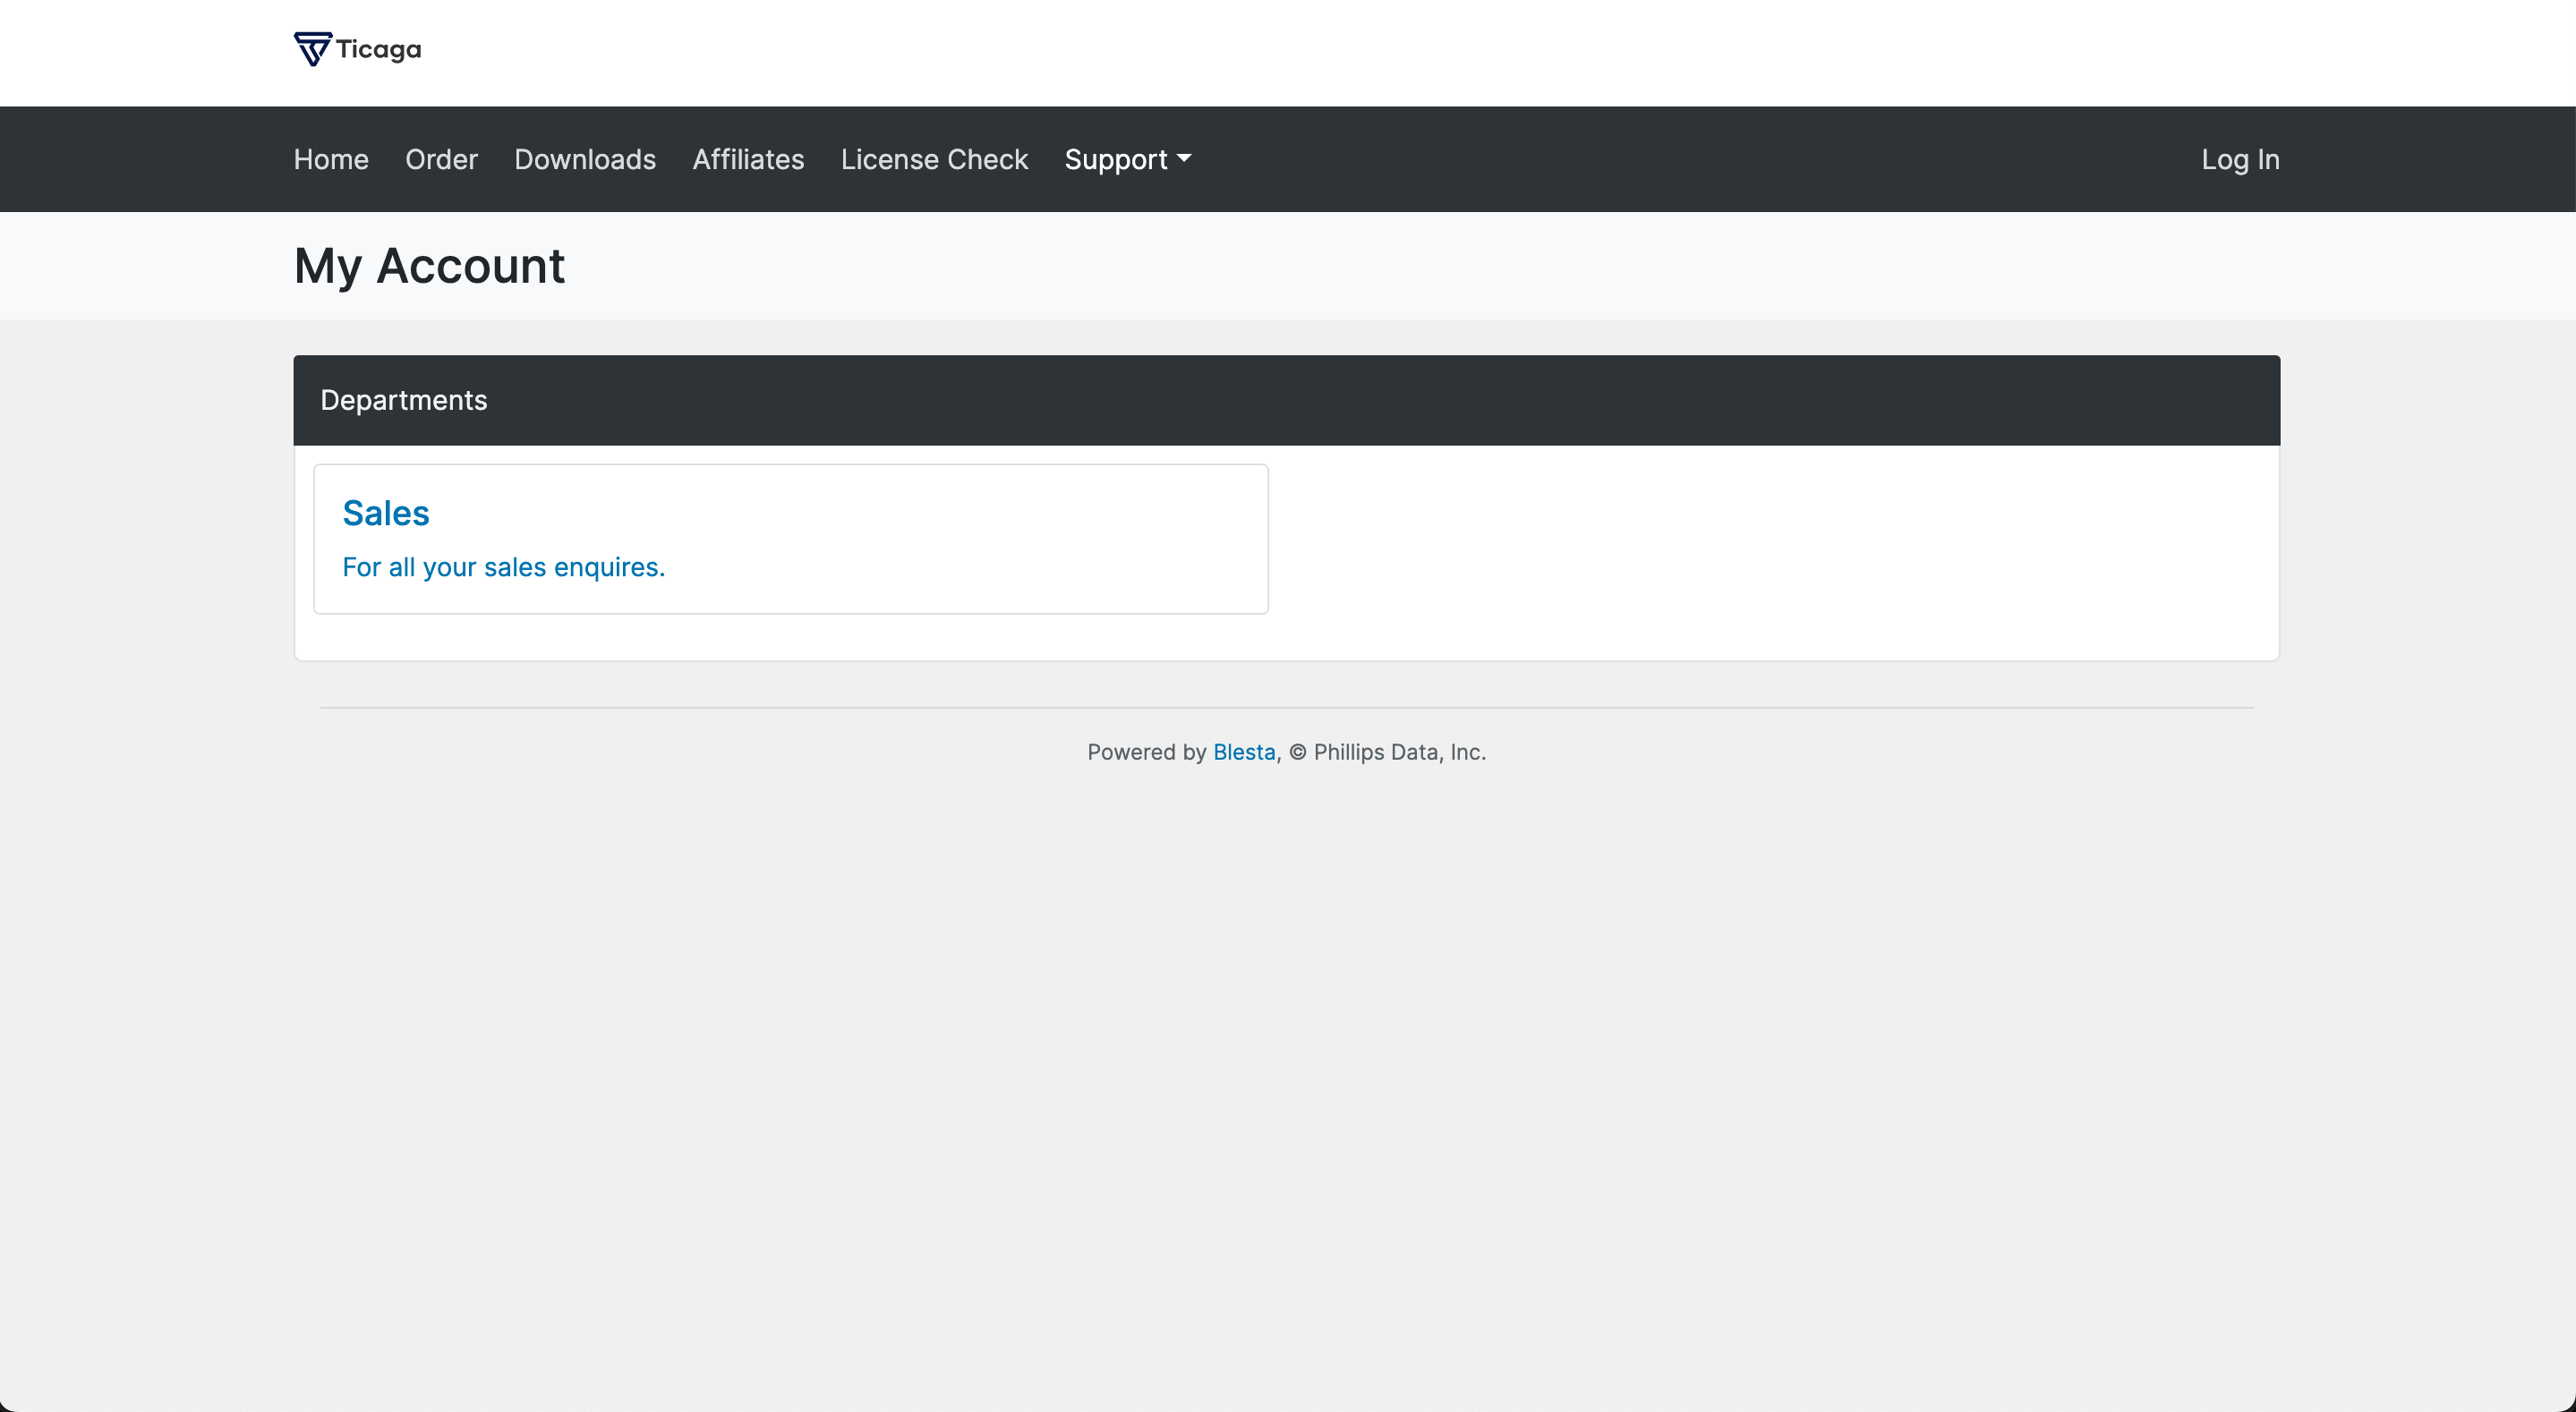
Now when your customer clicks on Create a ticket, they'll be shown the support departments they can open tickets in:
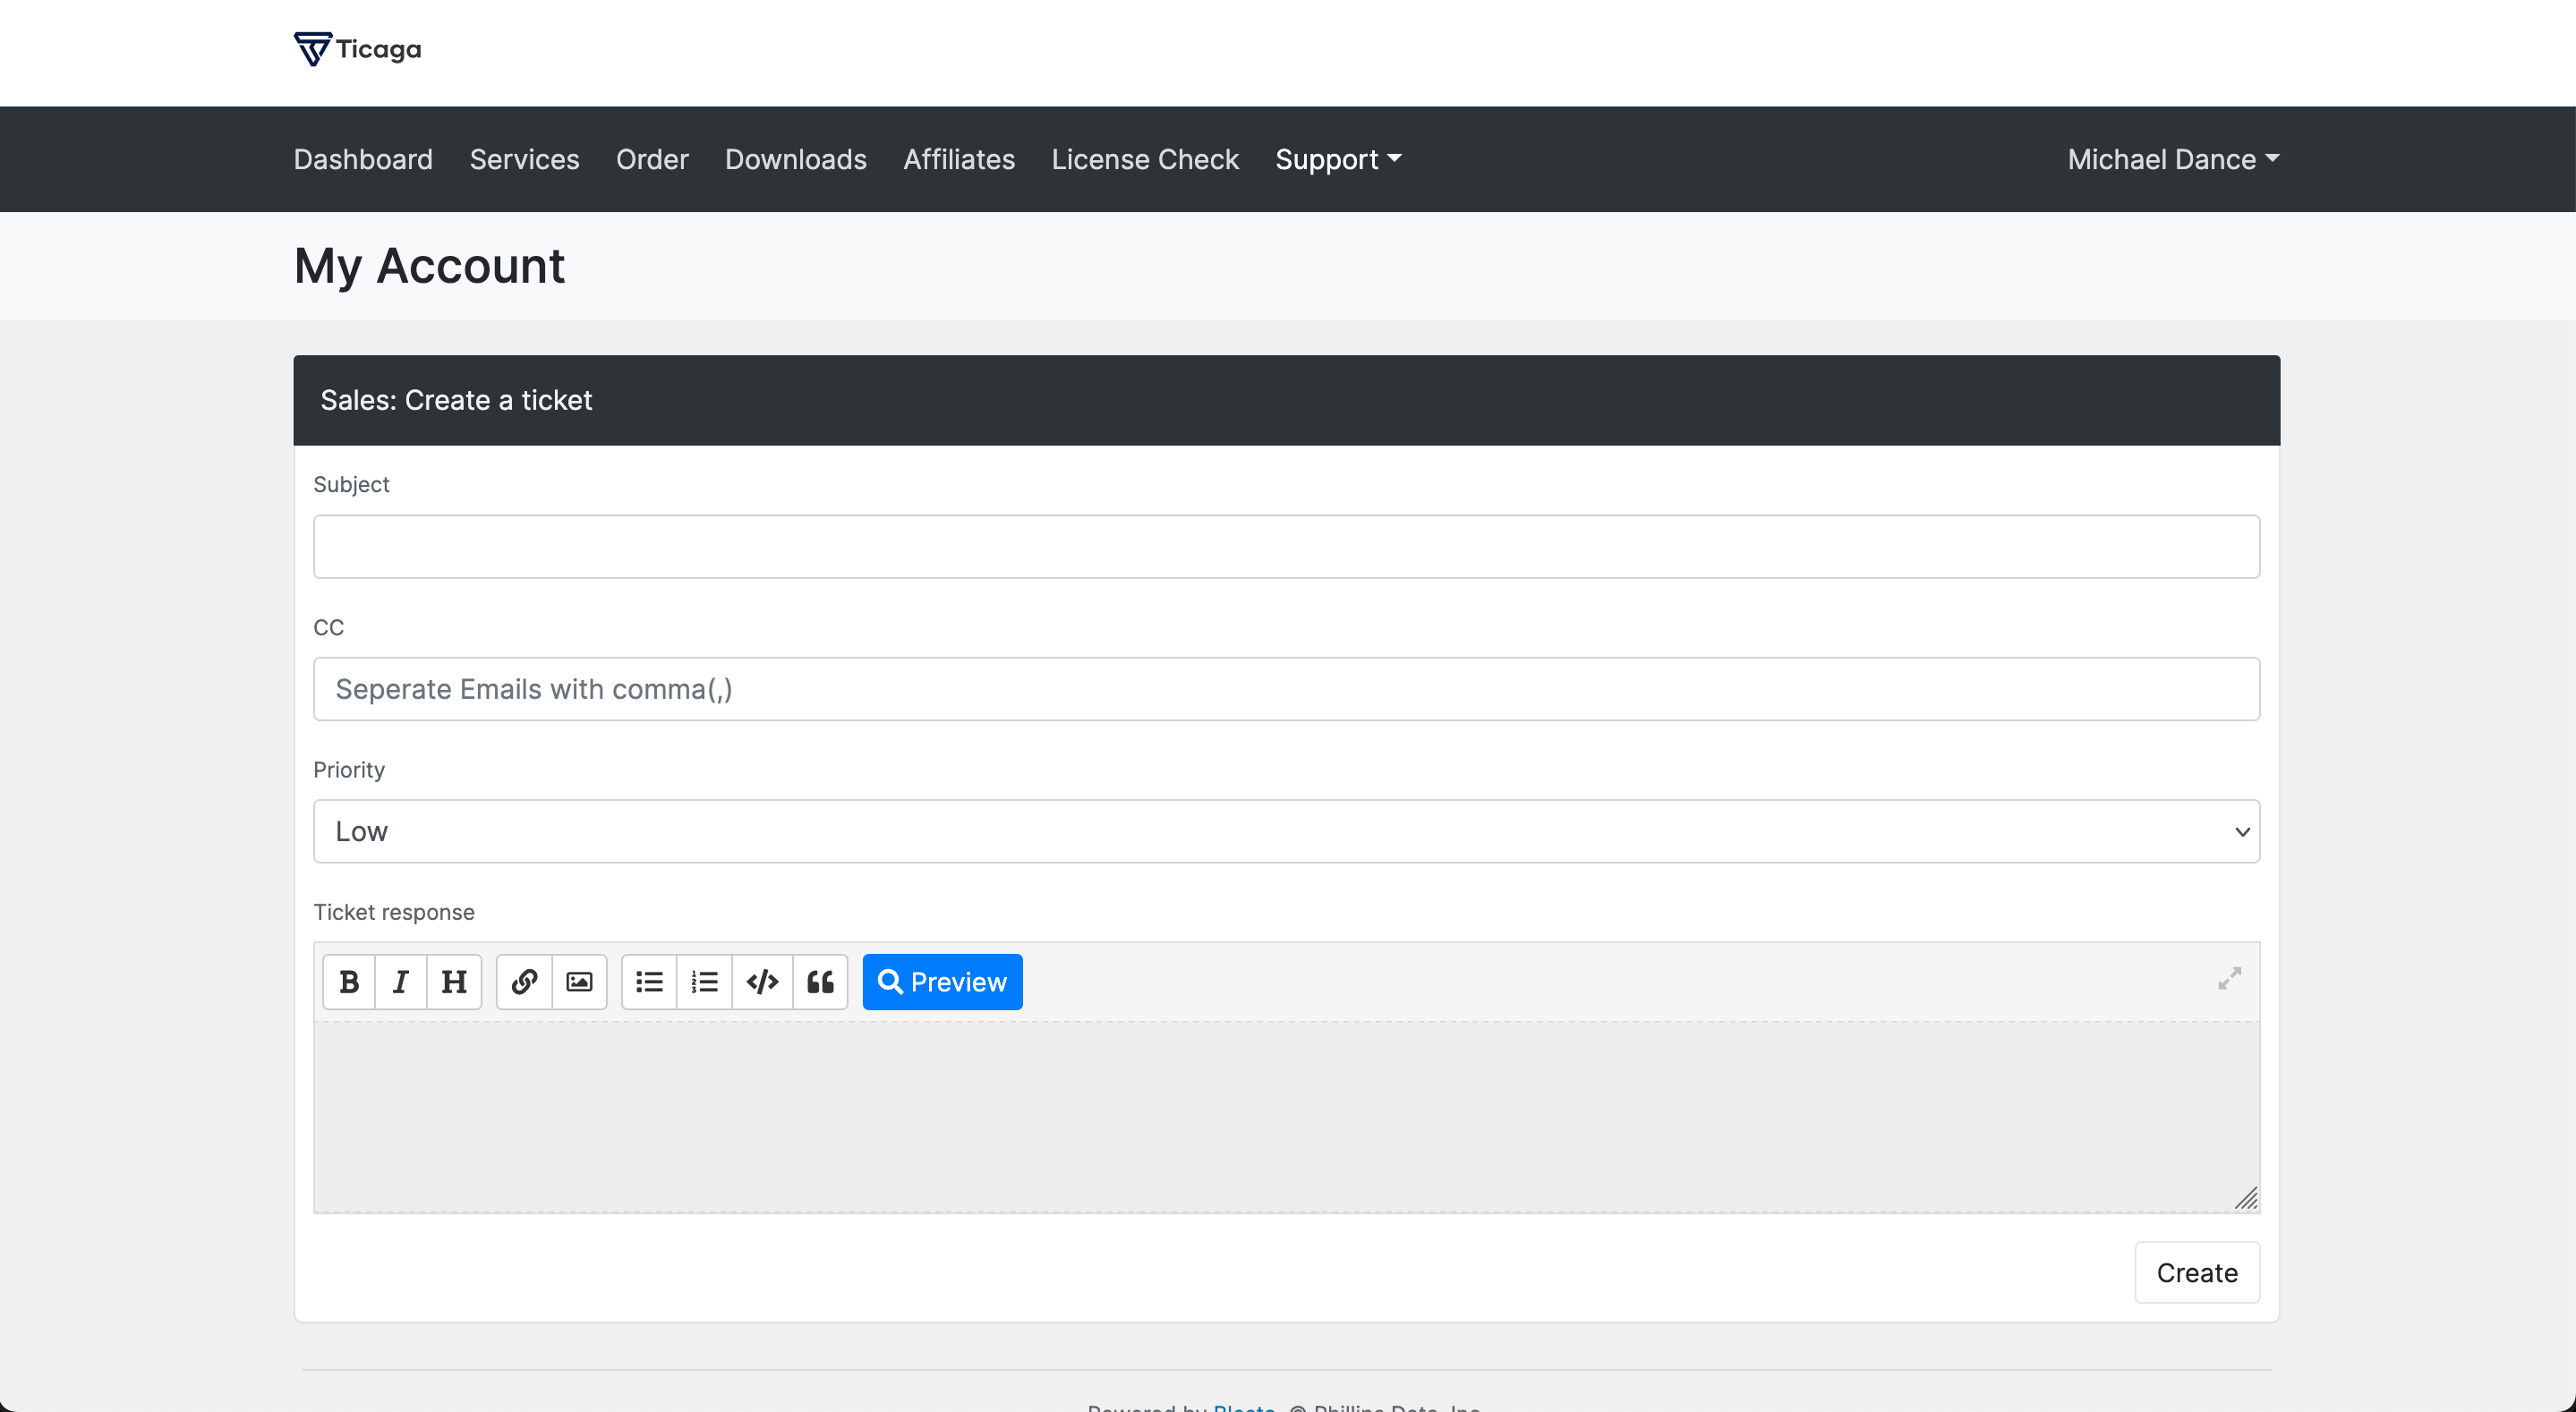
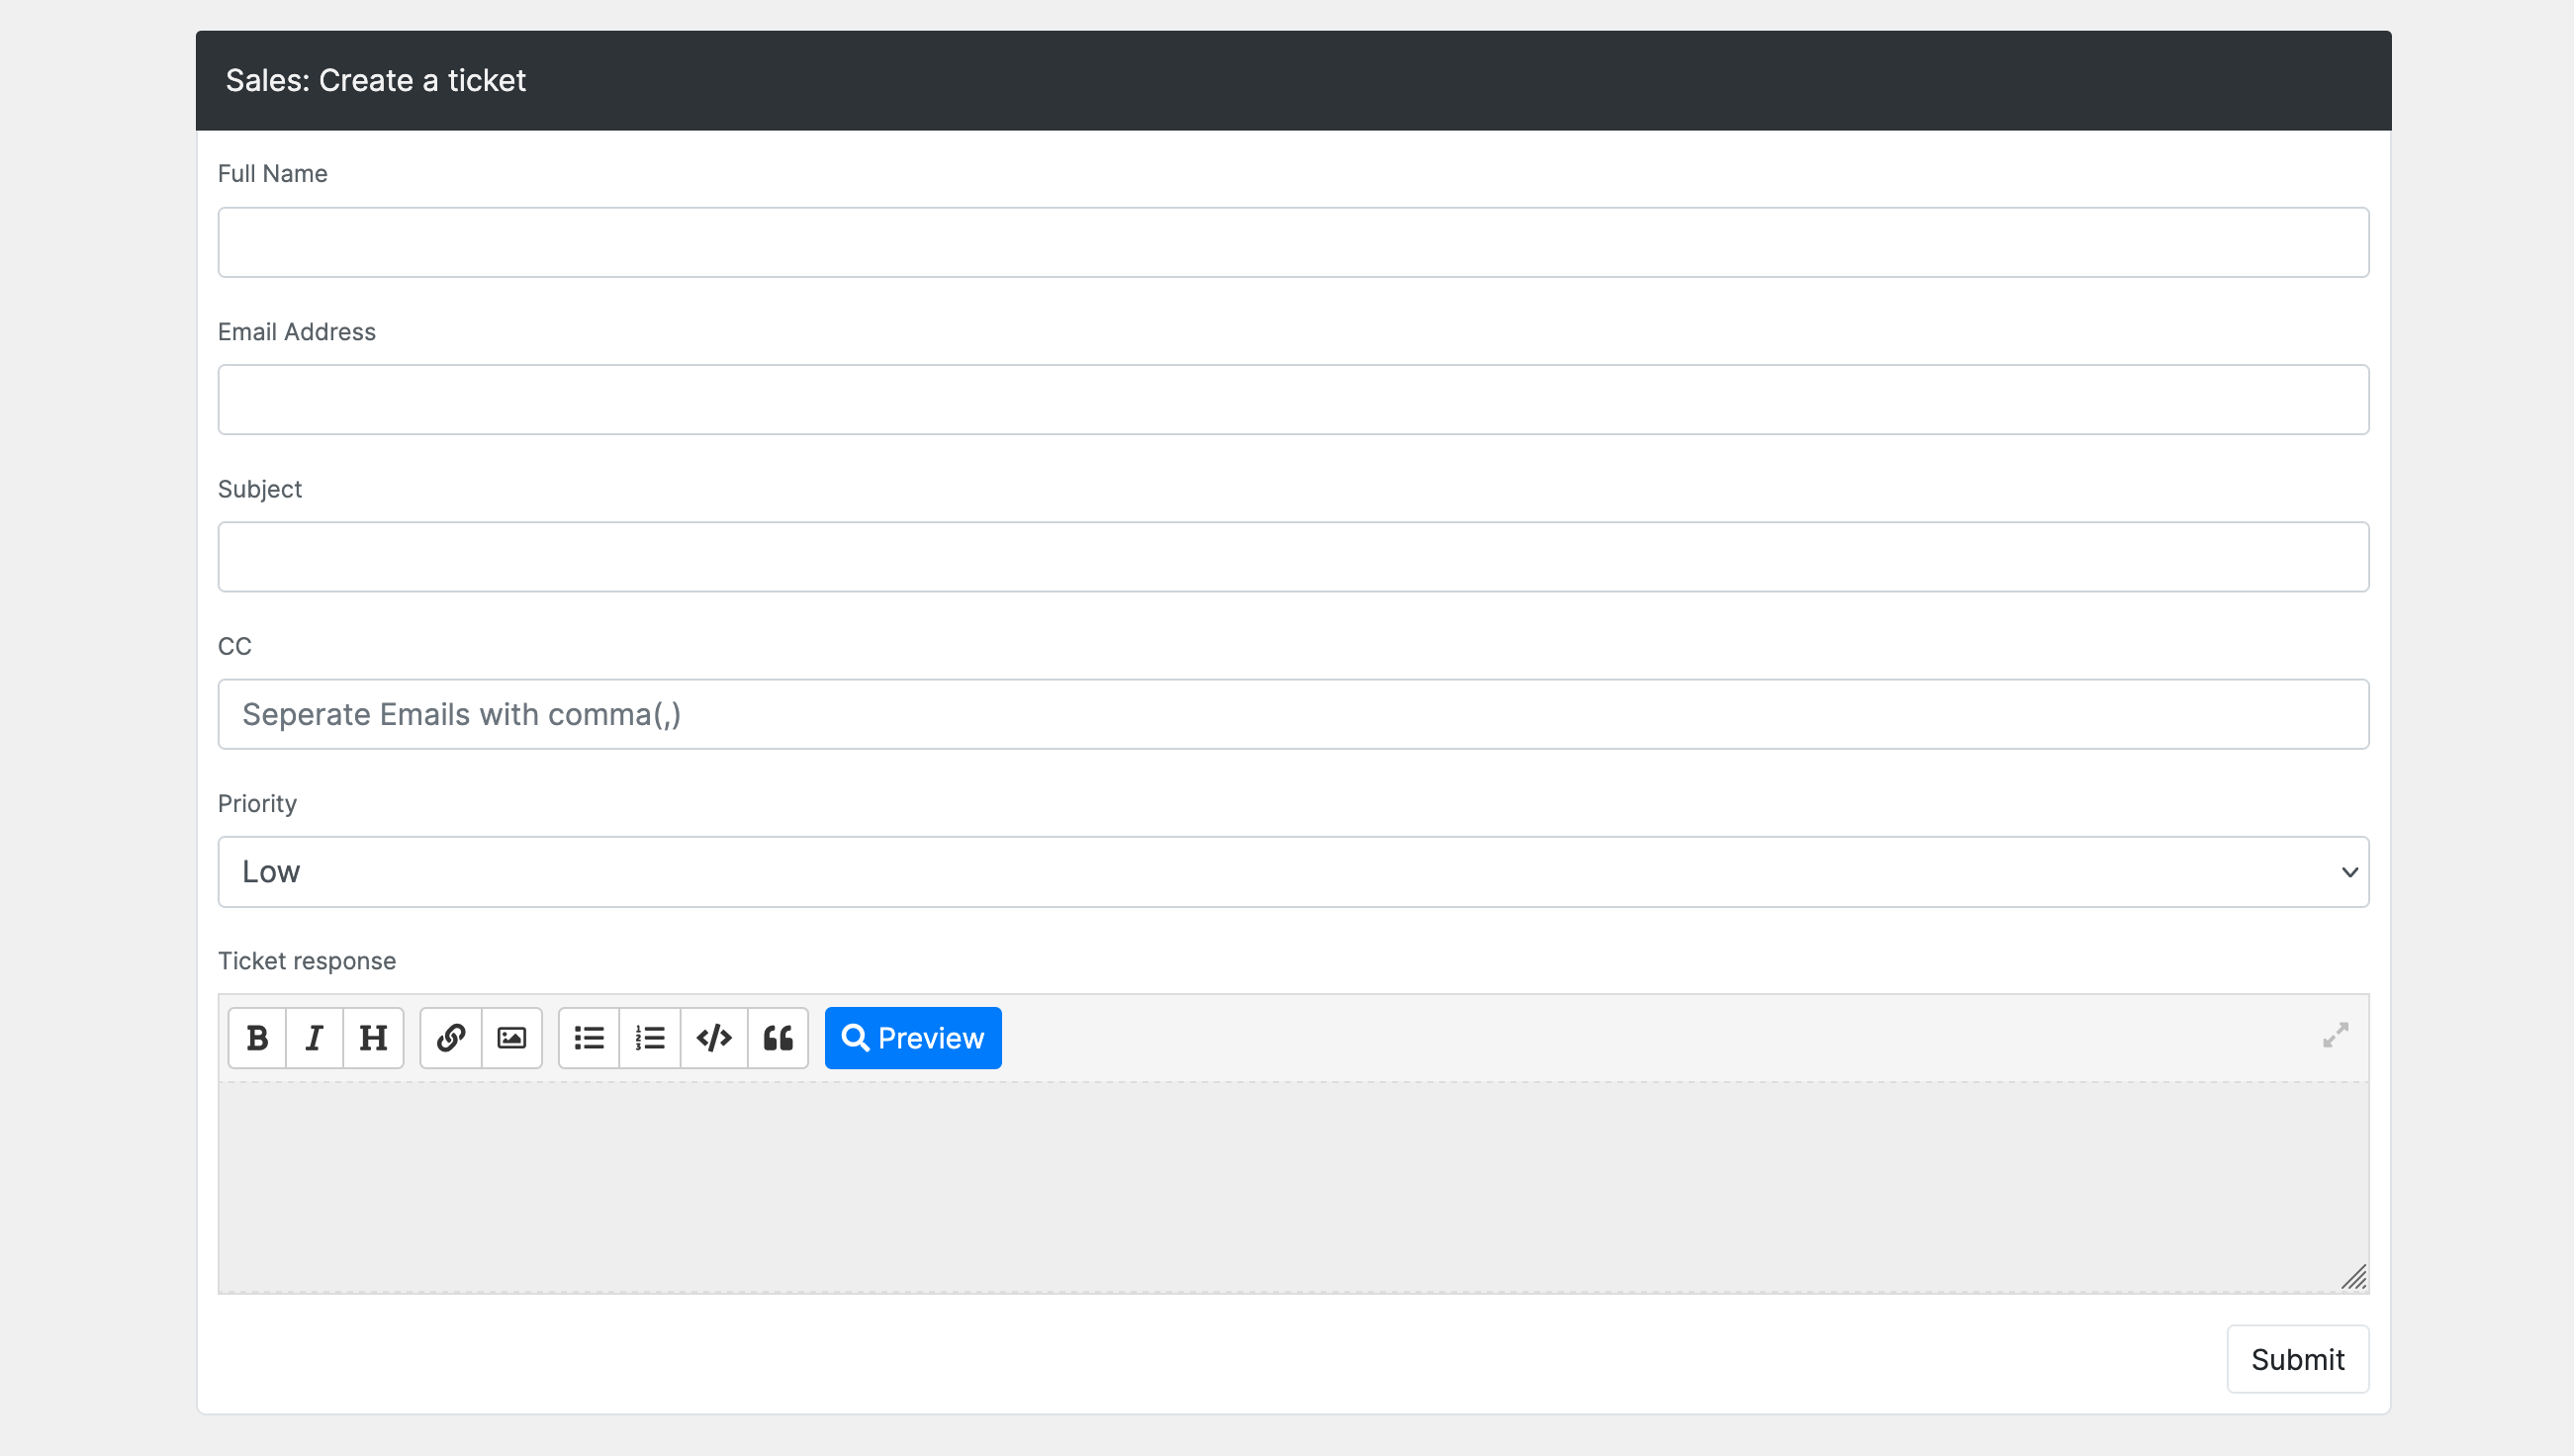
Your client can click on a department and be shown the create a ticket form, if they can use high priorities they'll be displayed here too:
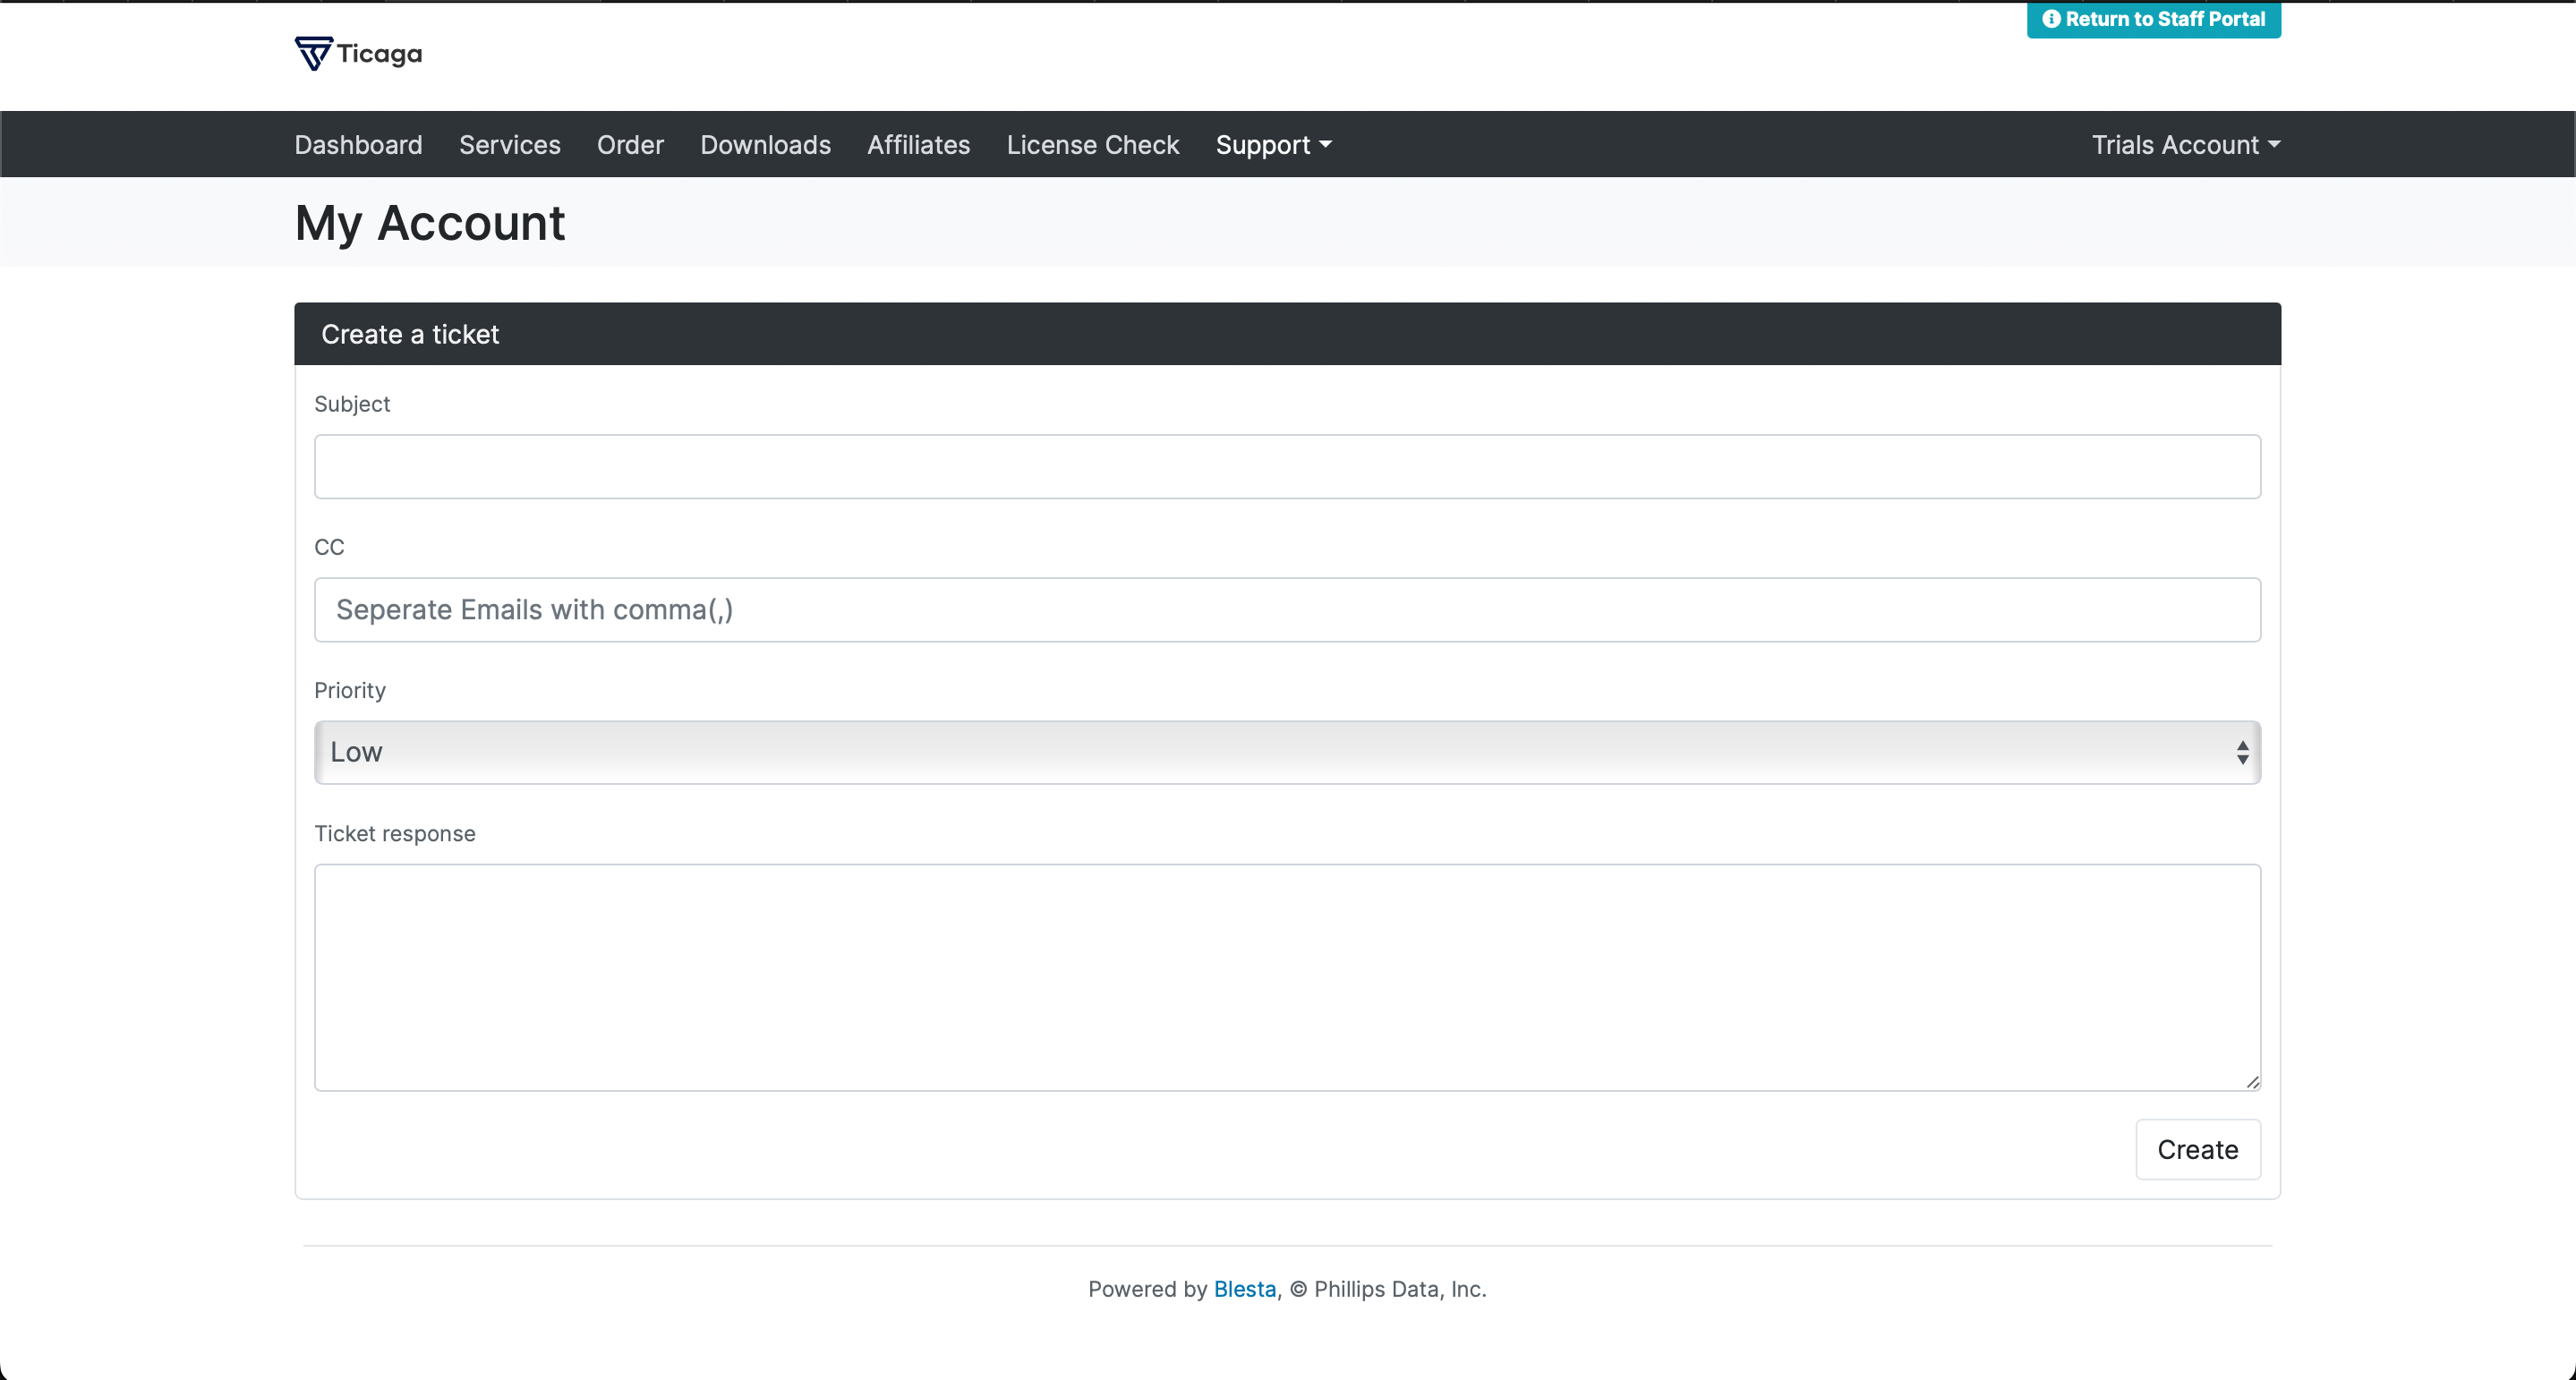
Or if the department allows Priorities they'll see this:
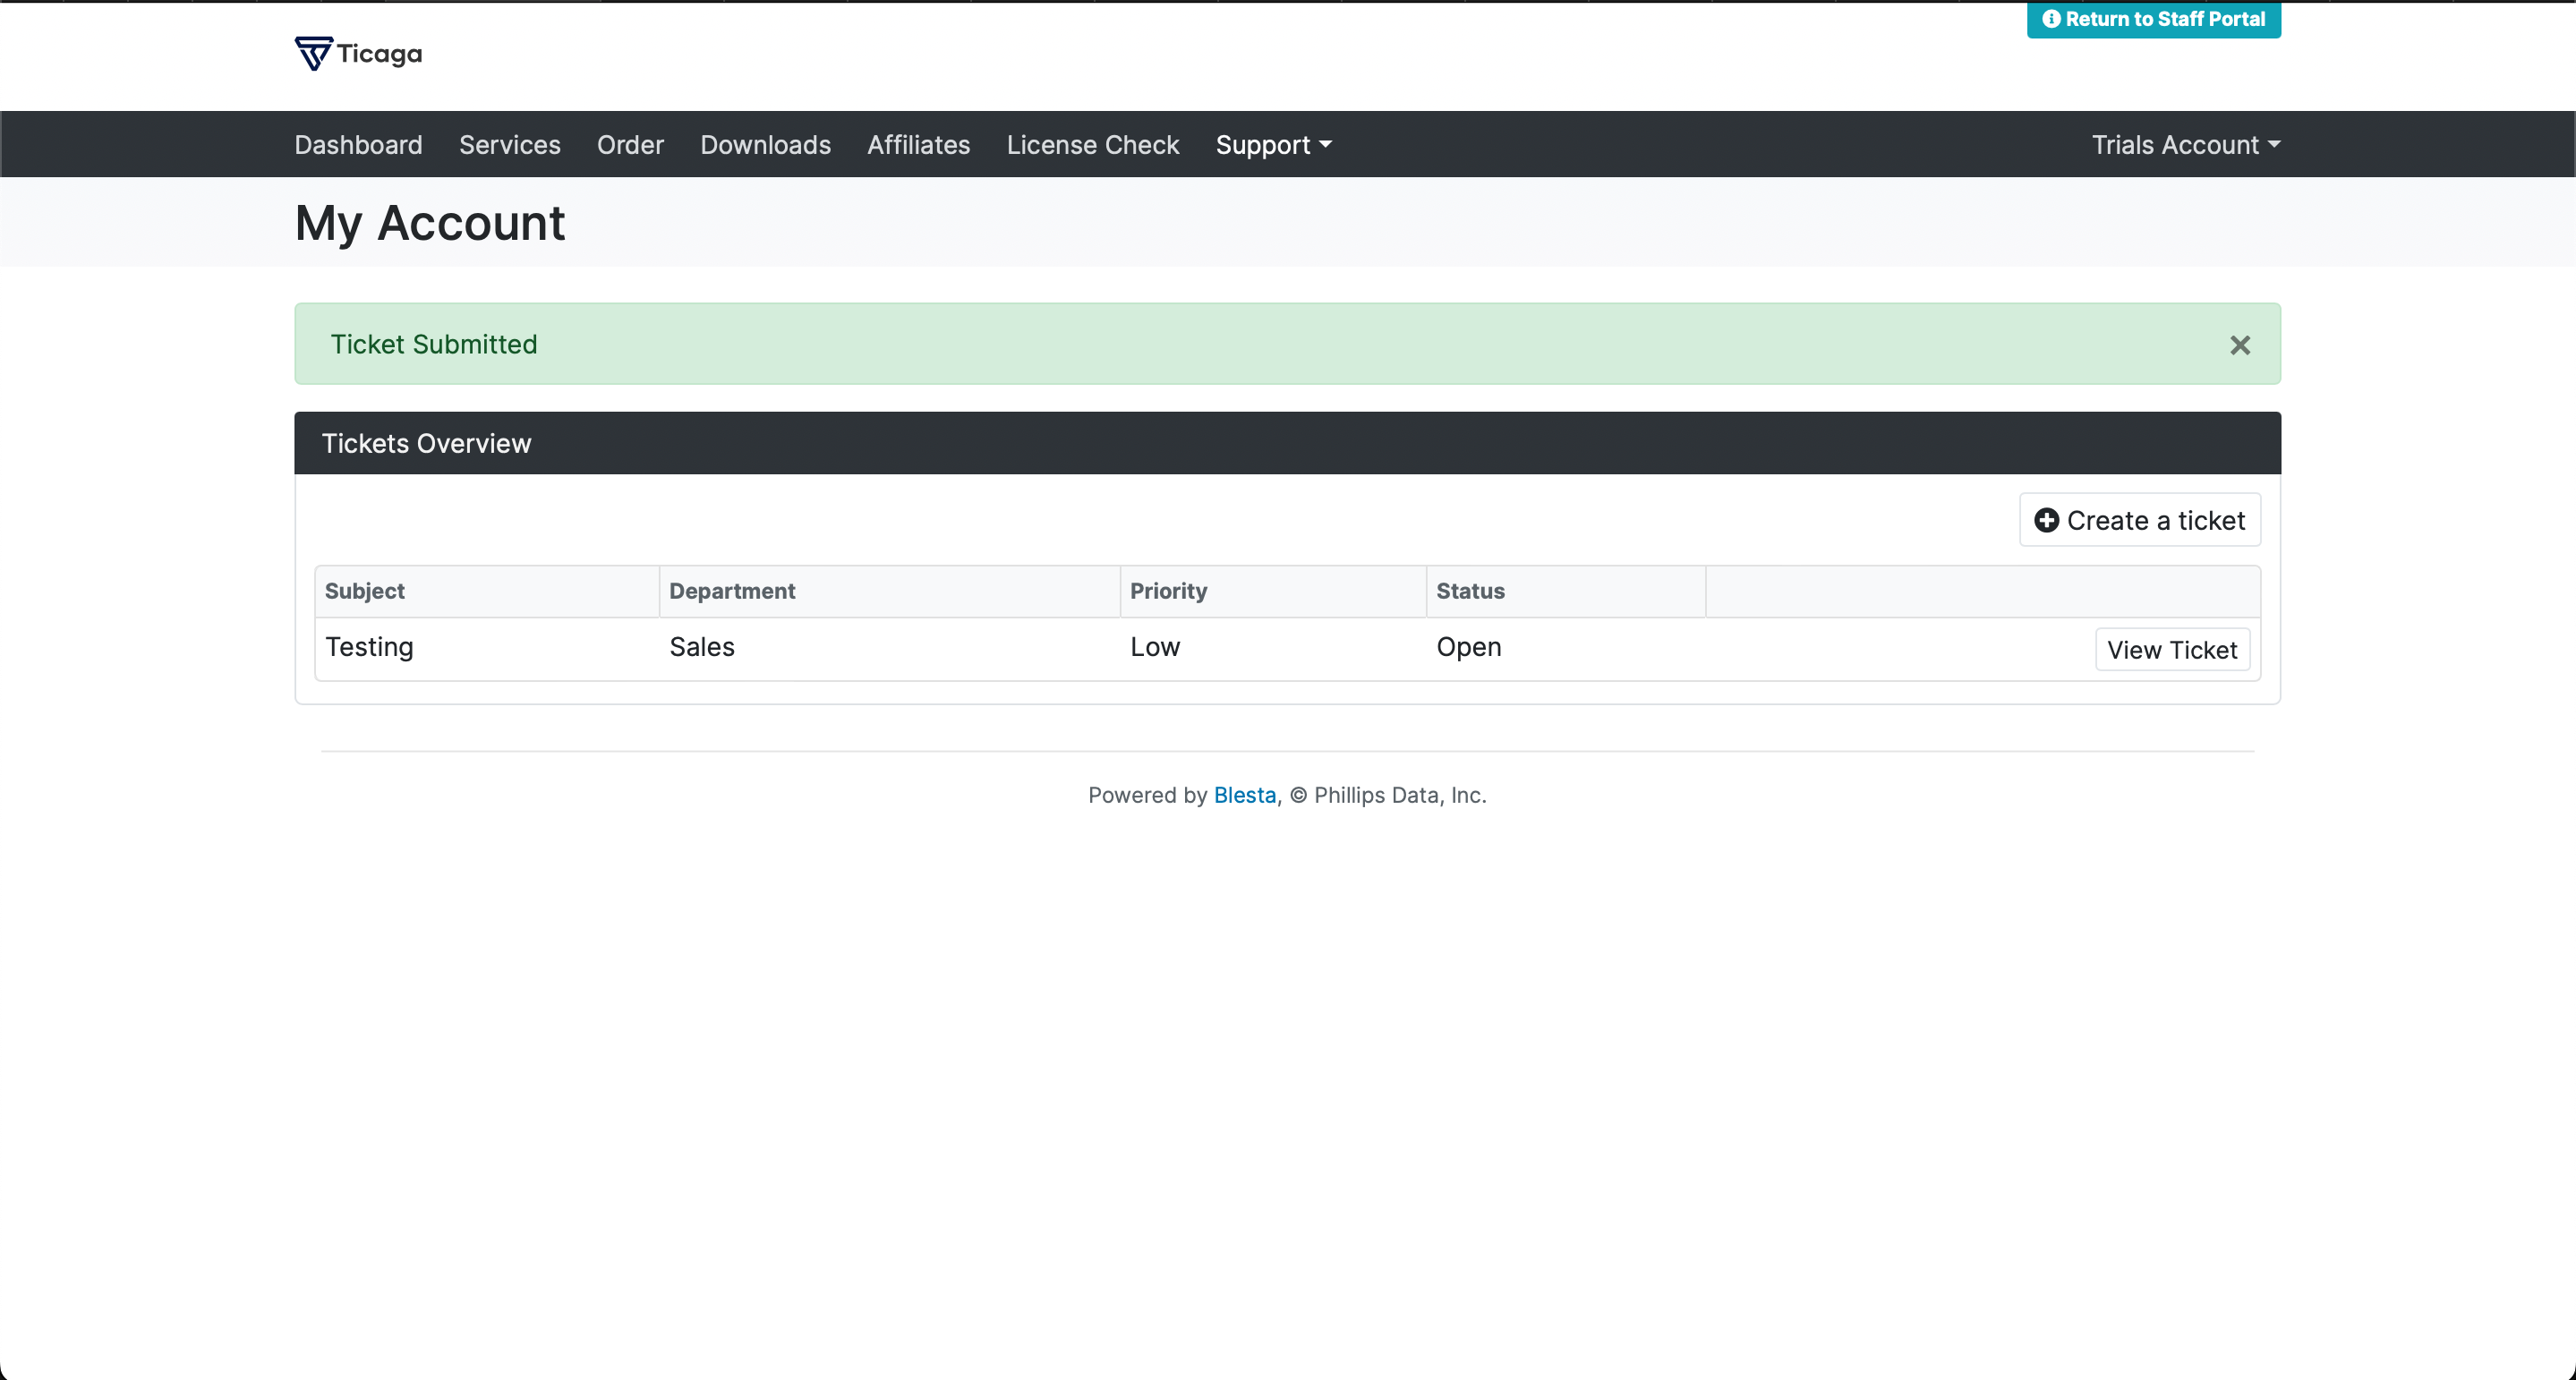
After they've submitted a ticket, they'll be shown all the tickets:
Clicking View ticket shows the replies from employees and the customer:
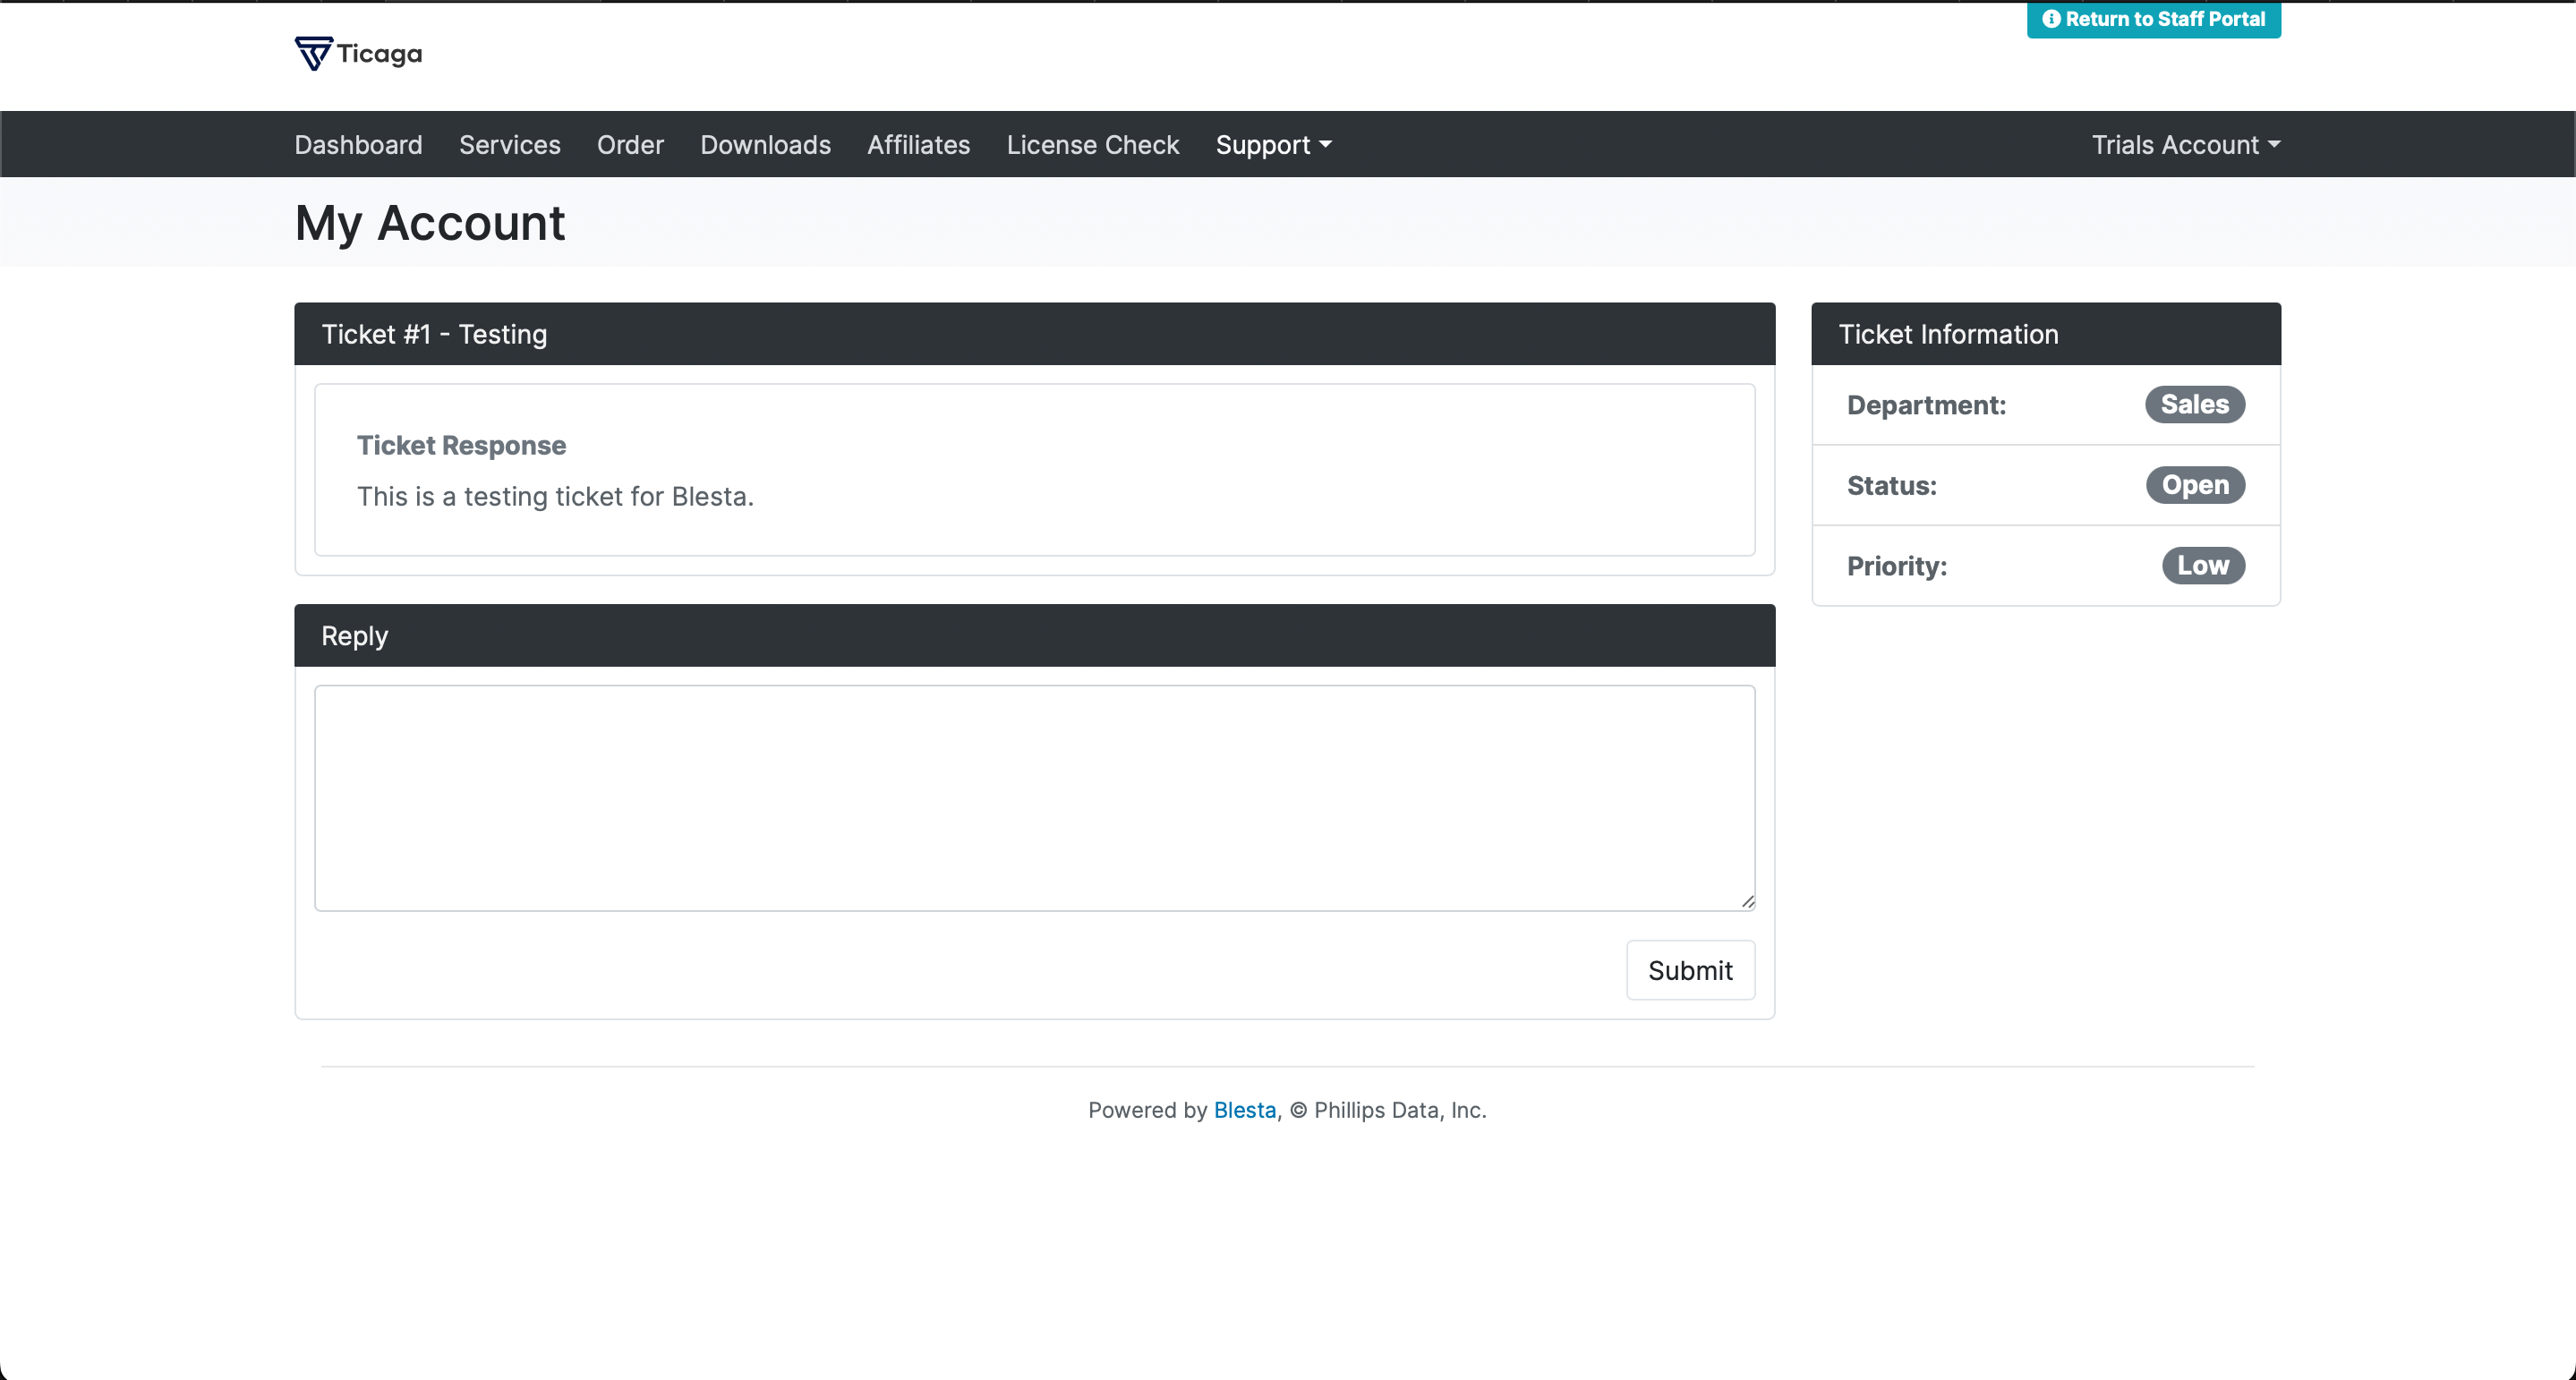
I want to re-add the Ticket information on the next update to the Blesta plugin like the old one:

How Guests can open a ticket.
Since version 2.0.0 of the Blesta plugin, your visitors (guests) can finally submit a ticket to your team.
They can click on Support >> Departments or if you've added a link to your portal they can simply click a link, they'll see the list of departments which are "public":
They simply click on the department to see the form:
They need to supply their Full Name and Email Address, unlike your customers who are logged in.