Tickets
Departments
Create a Department
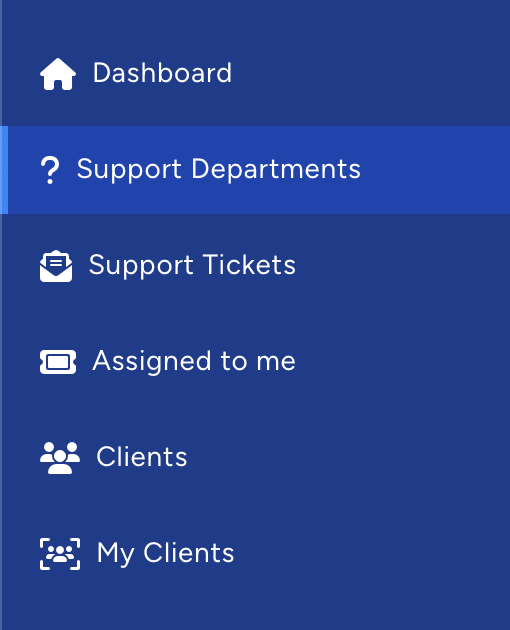
Firstly you want to select Departments on the left hand navigation.
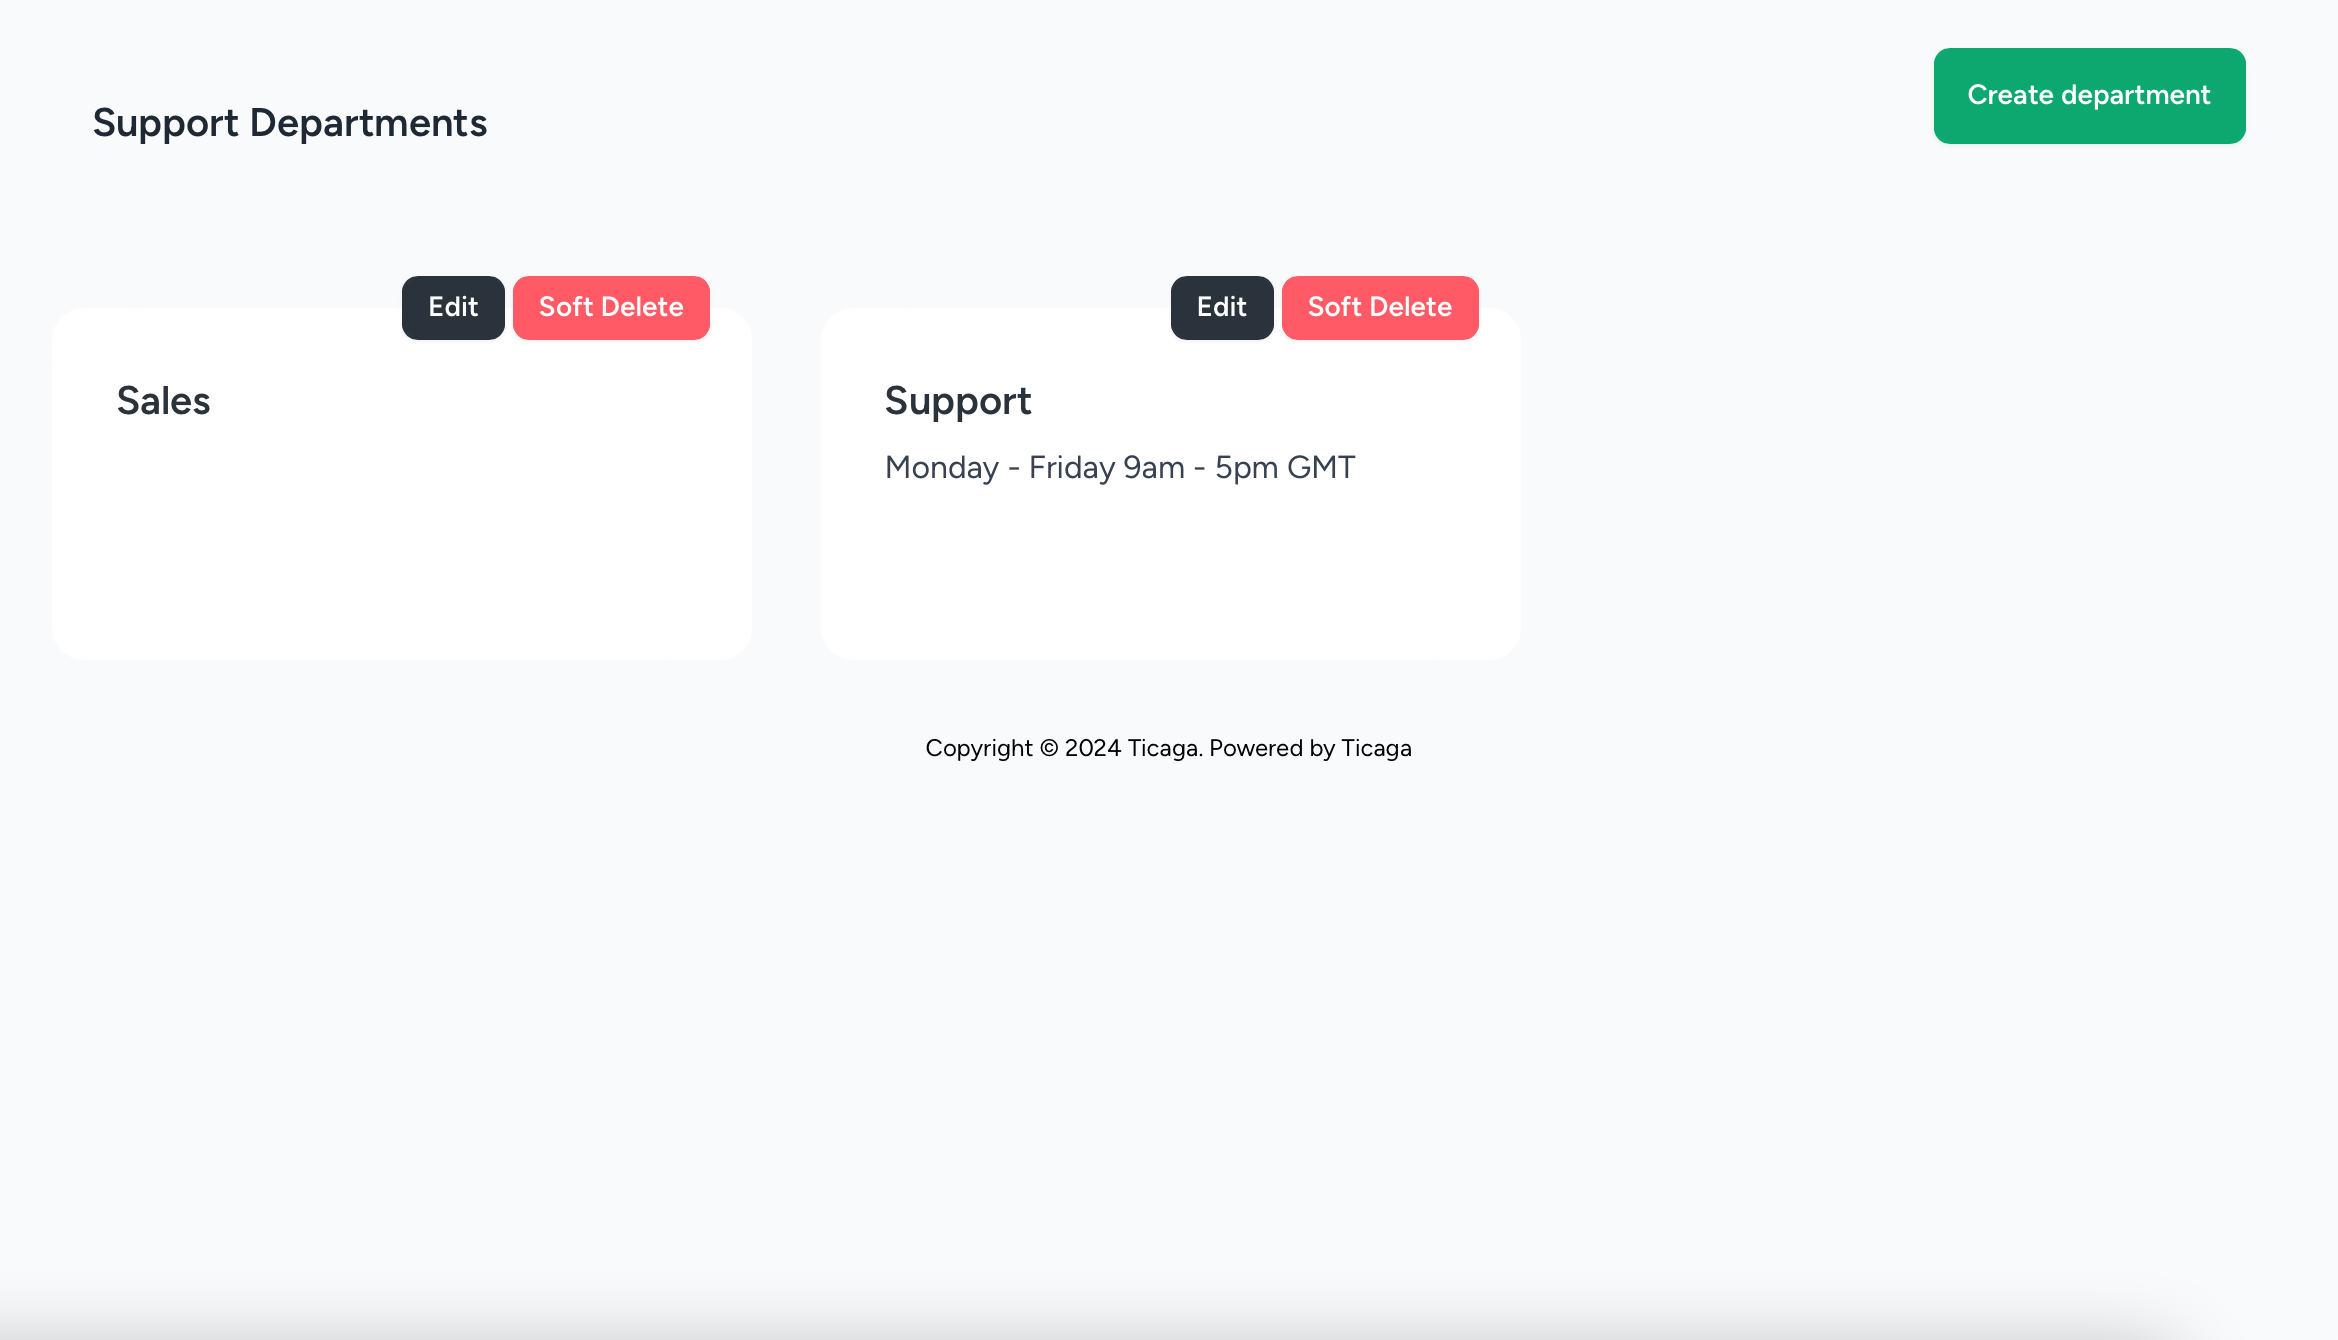
You will see this page, we've already created a Sales department. In this tutorial we'll be creating the support department.
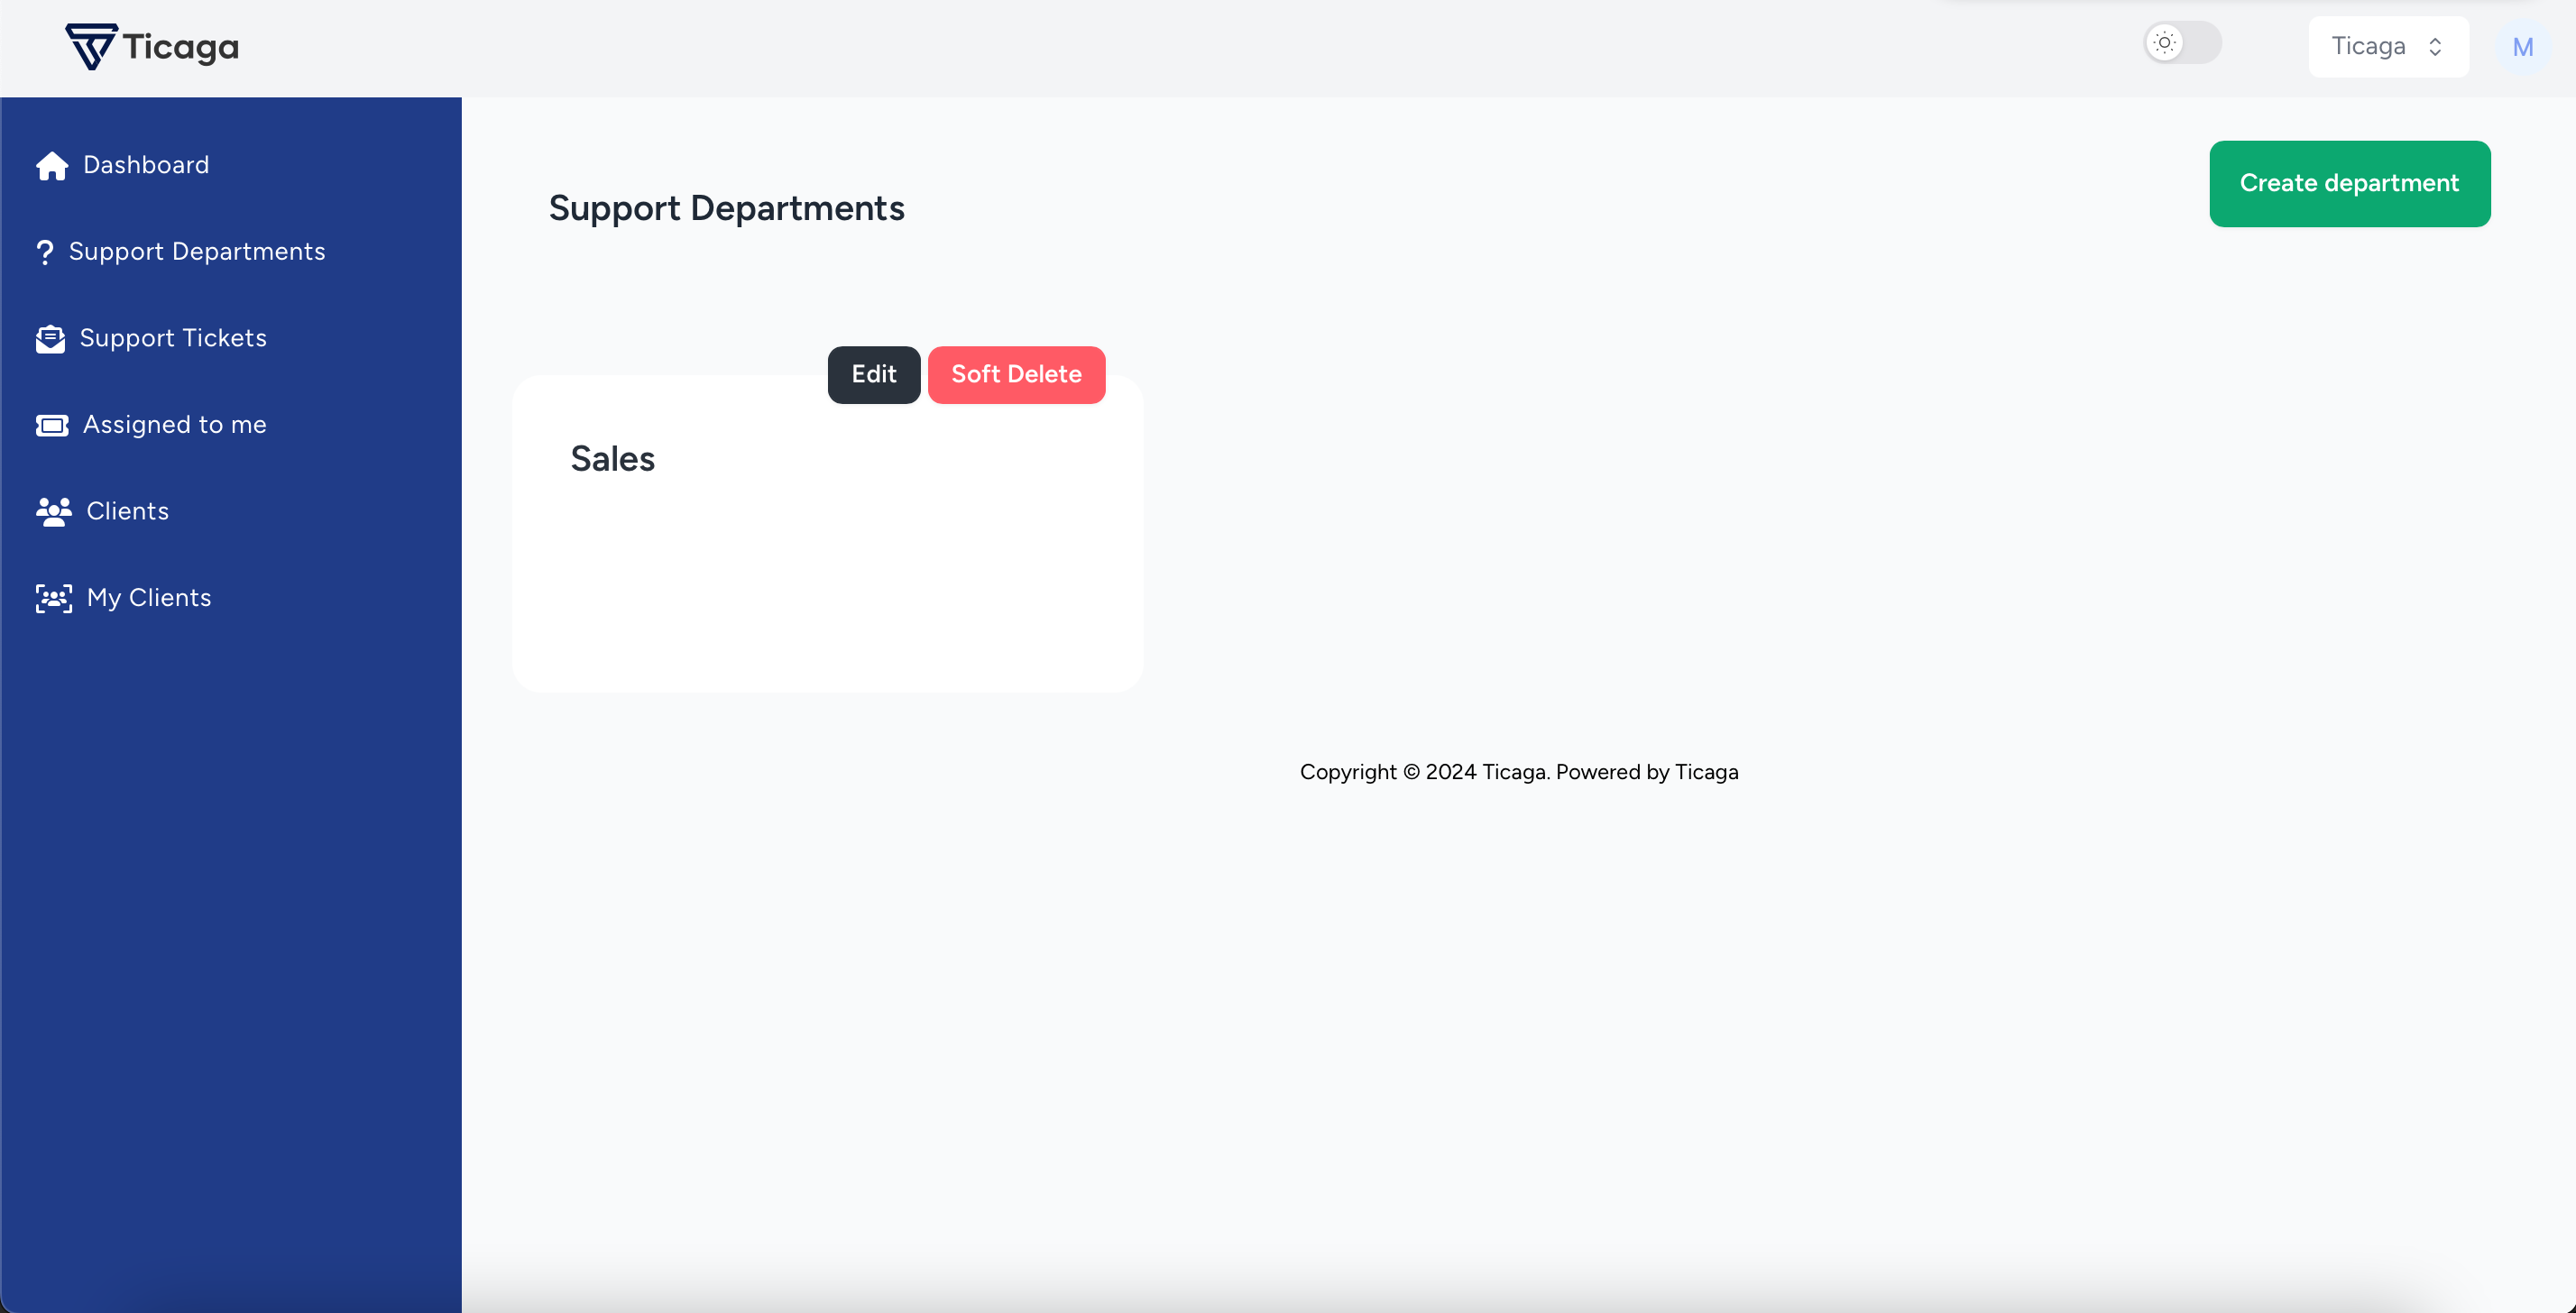
Now you can click on Create department button, to start creating your department.
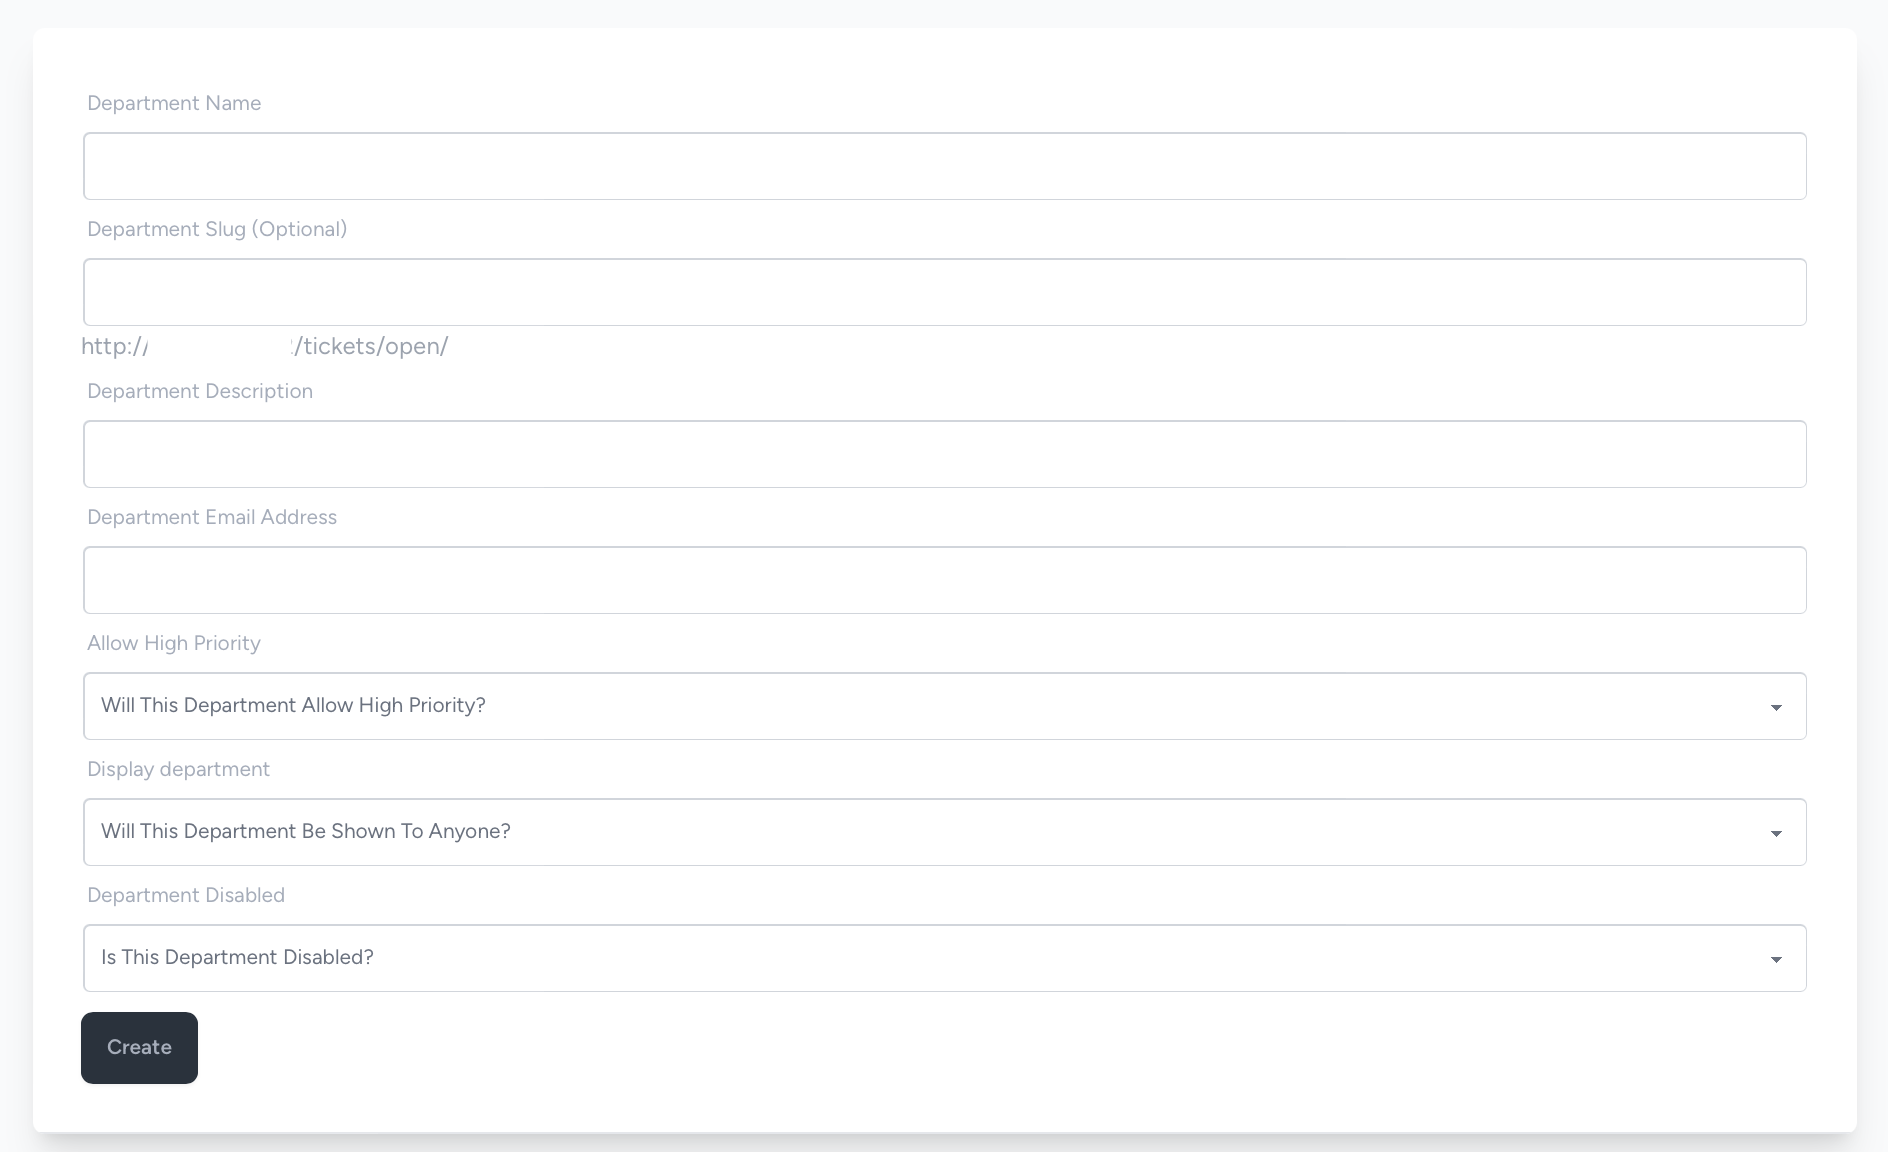
Department Name: The name of the department.
Description: You can enter a description here for the department this will be displayed under the name.
Department Slug: You can put the url to the department here, it is optional and it will generate a slug from the department name on creation.
Department Email Address: This is the email address for the department, this will be where the emails are from. This needs a valid domain in it.
Allow High Priority: Yes or No, if you select Yes, then your customers or guests can open a ticket with a Low, Medium, High or Emergency, or any other priorities you create in the Enum, otherwise it's just Low, Medium or any other priorities you've created which aren't "High Priority".
Who can open tickets: This setting sets whether it's
- Private shared link:- Shown to no-one, you can only access it via the link.
- Public:- Shown to everyone.
- Customers only:- Shown to just customers.
Is the department visible: Is the department disabled? Yes means no-one can access it. No means anyone can access it depending on the "Who can open tickets" setting above.
After you've clicked create, you will be able to see and use the department.
Tickets Overview
Opening a ticket
Firstly you want to select Support Departments on the left hand navigation.
Then you can click a support department you wish to open a ticket in:
You will now see a form to fill in to create a ticket:
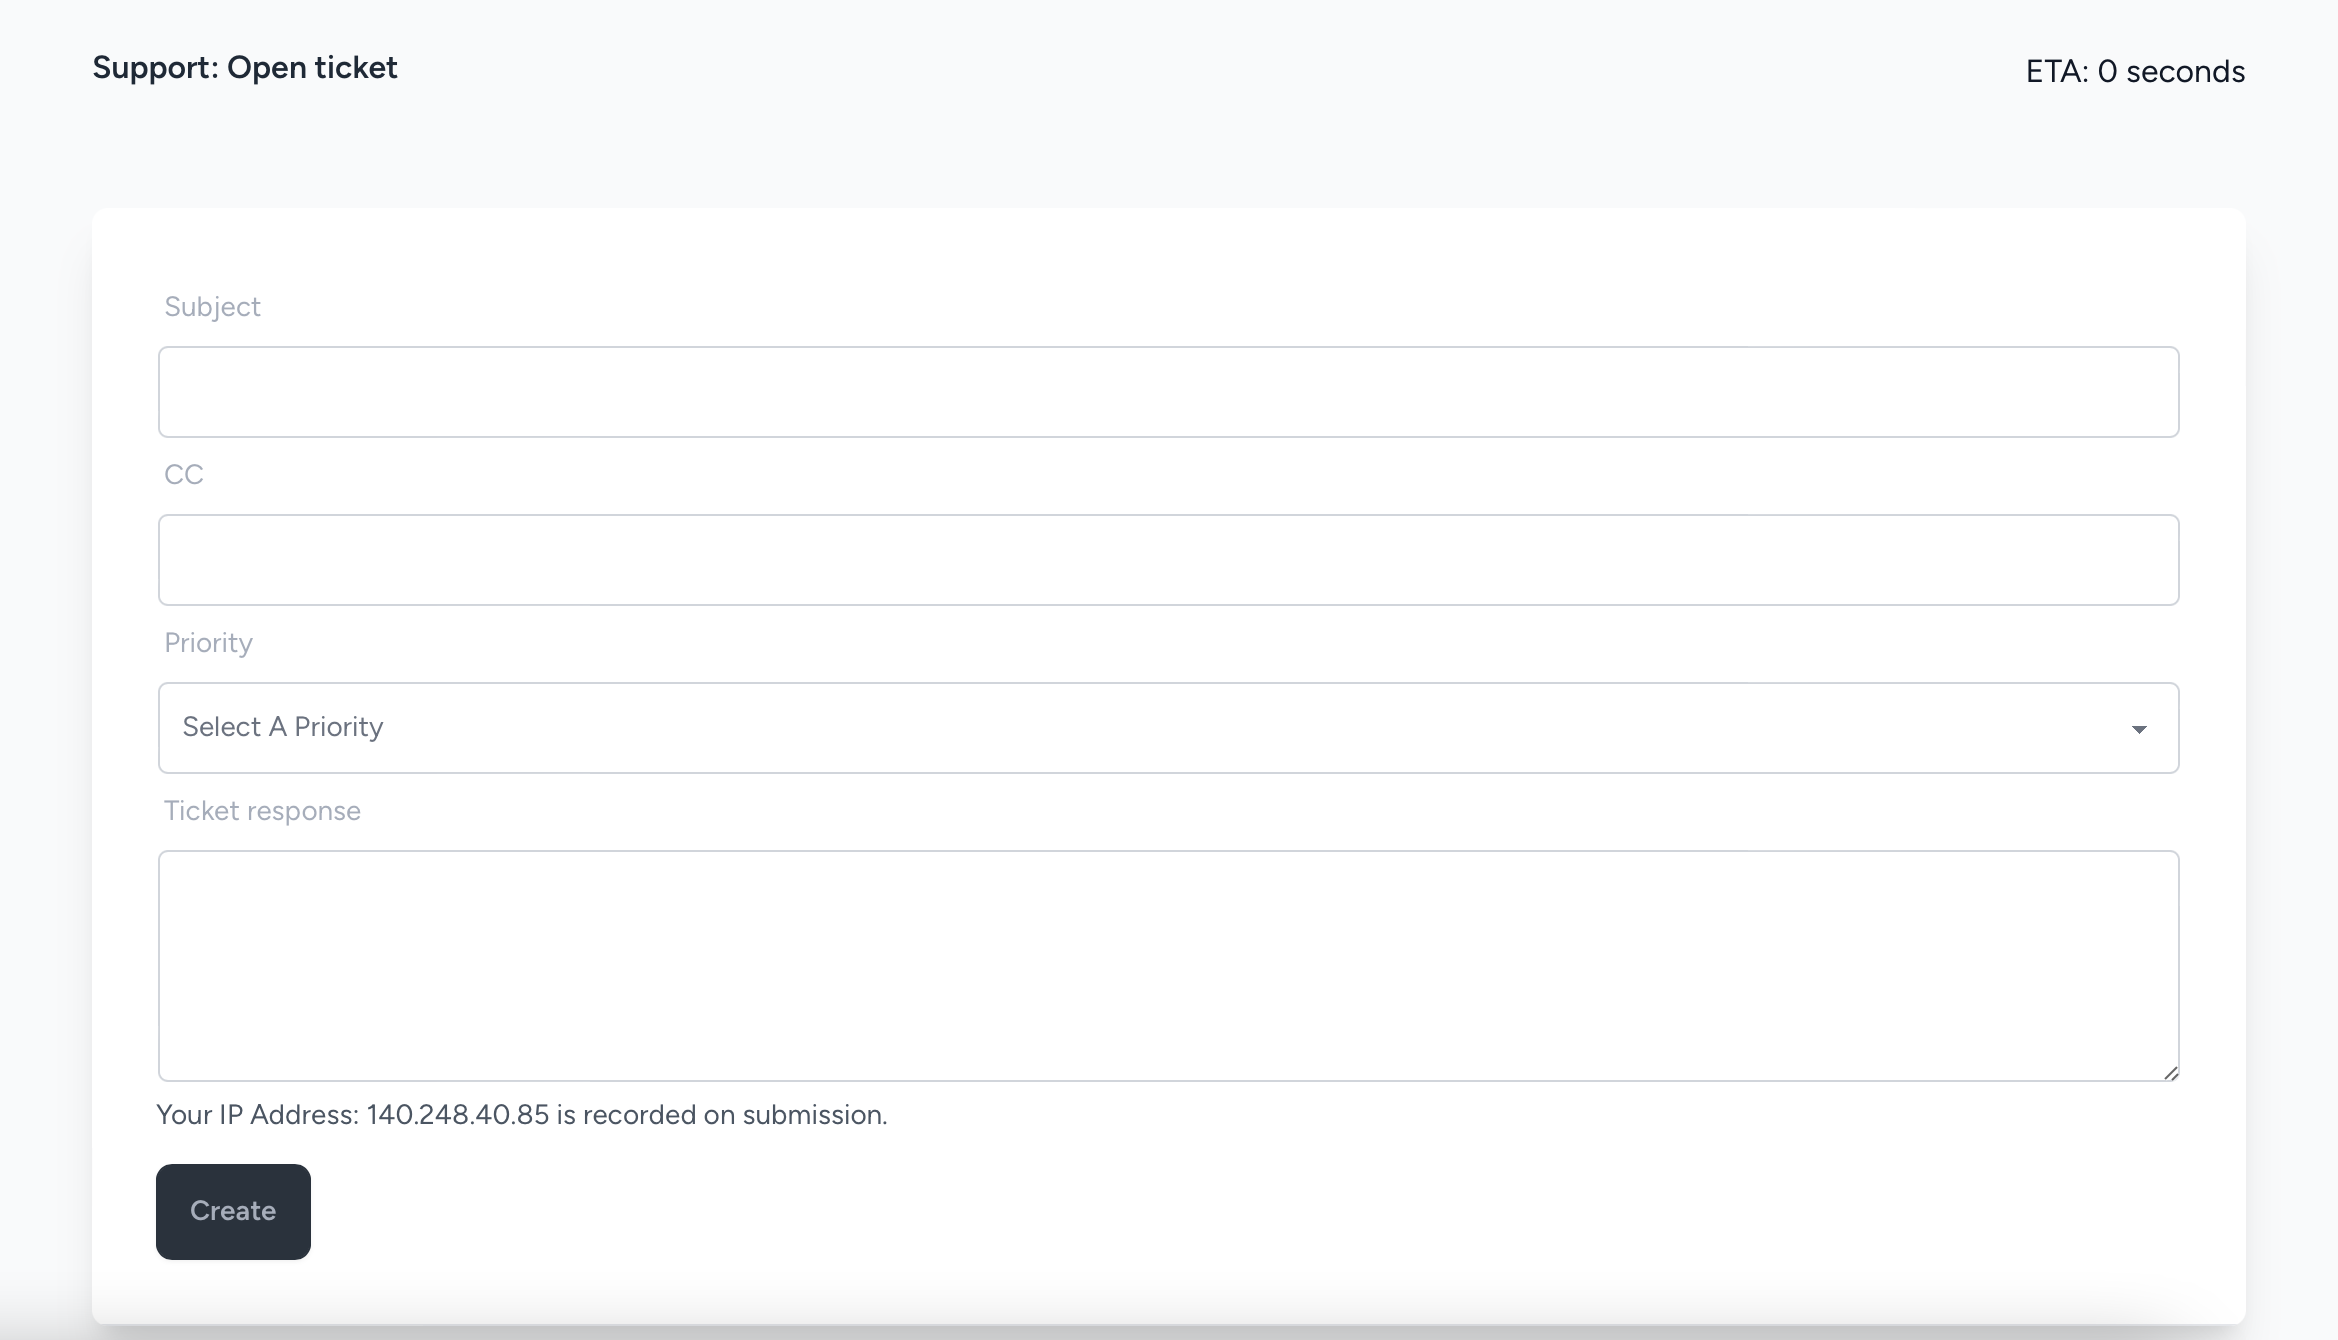
Support: Is the name of the support department.
ETA: Is the estimate time of a response.
Subject: Your brief reason for the ticket.
CC: Any emails you wish to send a carbon COPY of the ticket too, remember they'll get access to the public side of the ticket to reply as-well as yourself.
Priority: Select the priority of the ticket, you can set this to Low, Medium, High, Emergency or any other pre-set priorities allowed.
Ticket Response: This is the ticket content itself, please provide as much detail in this ticket to help the agents assist you to the fullest.
IP Address: Your IP Address is recorded with the ticket to prevent abuse.
Viewing a ticket
When you're viewing a ticket you will see the following:

Viewing Ticket: Will show you the subject of the ticket.
Customer: Shows you the currently assigned customer.
If the ticket is from a non customer, you can assign the ticket to a customer via the dropdown.
This is only shown to the Agents.

Now if you're an Agent you can view the following section.
You can change the Department, Status, Priority of the ticket, as-well as assigning the ticket to an Agent.
If you're an Account manager for a customer, their tickets automatically get assigned to you. You can however change them to not assigned or to another agent if required.
Responses:
Customers show up in grey and the first ticket reply will show up with stars for the customer to rate you. If they rate you, they'll be a solid Yellow.
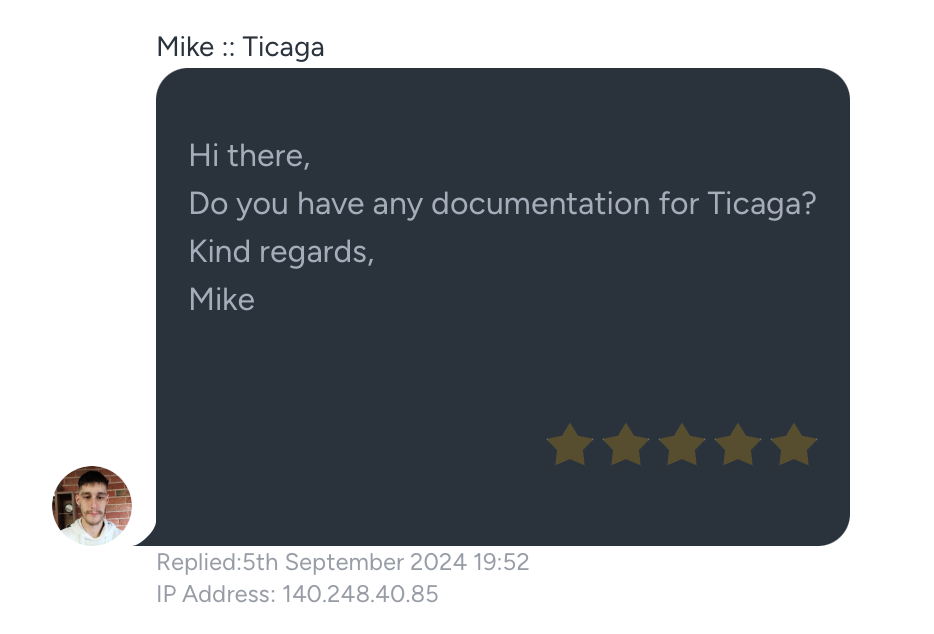
Customer's replies are always on the left.
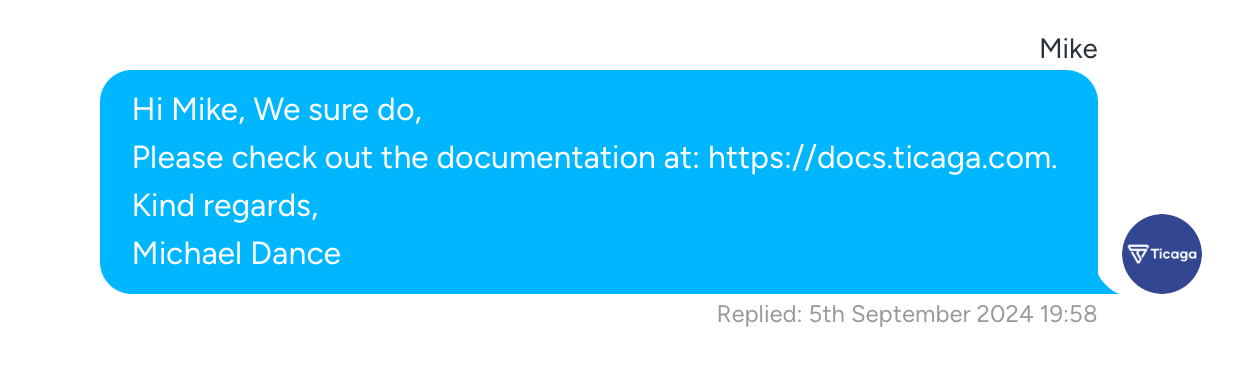
Agent replies are always on the right, in blue and don't show the IP Address.
You can leave Notes for other agents, these don't show up for the customer. They are in Yellow just like the Agents and always on the right hand side.

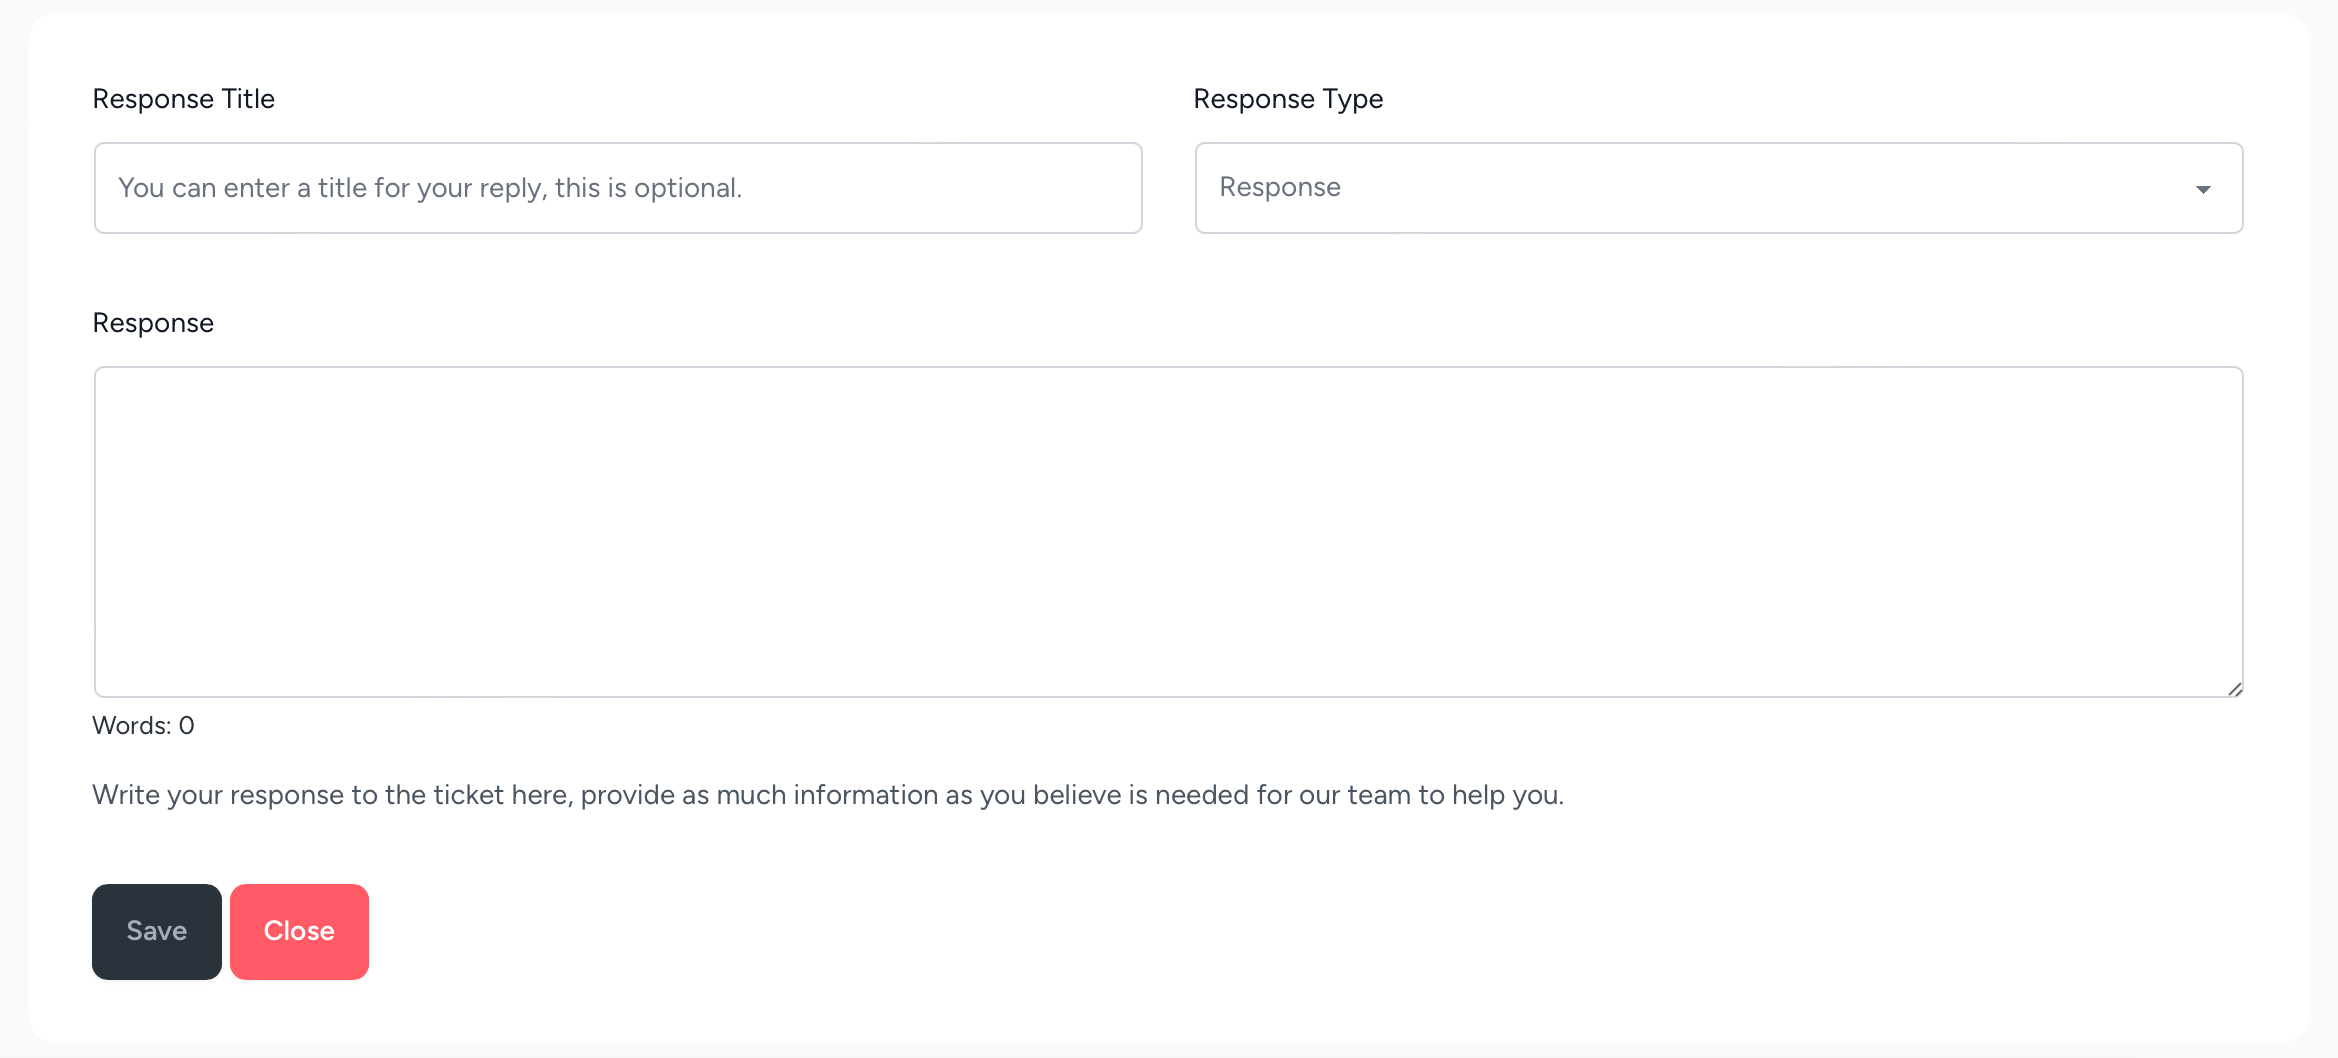
Response Title: You can enter a subject for your response, this will be used instead of the ticket subject. This is optional and not required.
Response Type: If you're an Agent you get this option to either reply to the customer or leave a Private Note for your colleagues.
Response: This is where you can write your response to the ticket. Provide as much detail as you can to help.
Save: This submits the response.
Close: This closes the ticket and marks it as resolved.
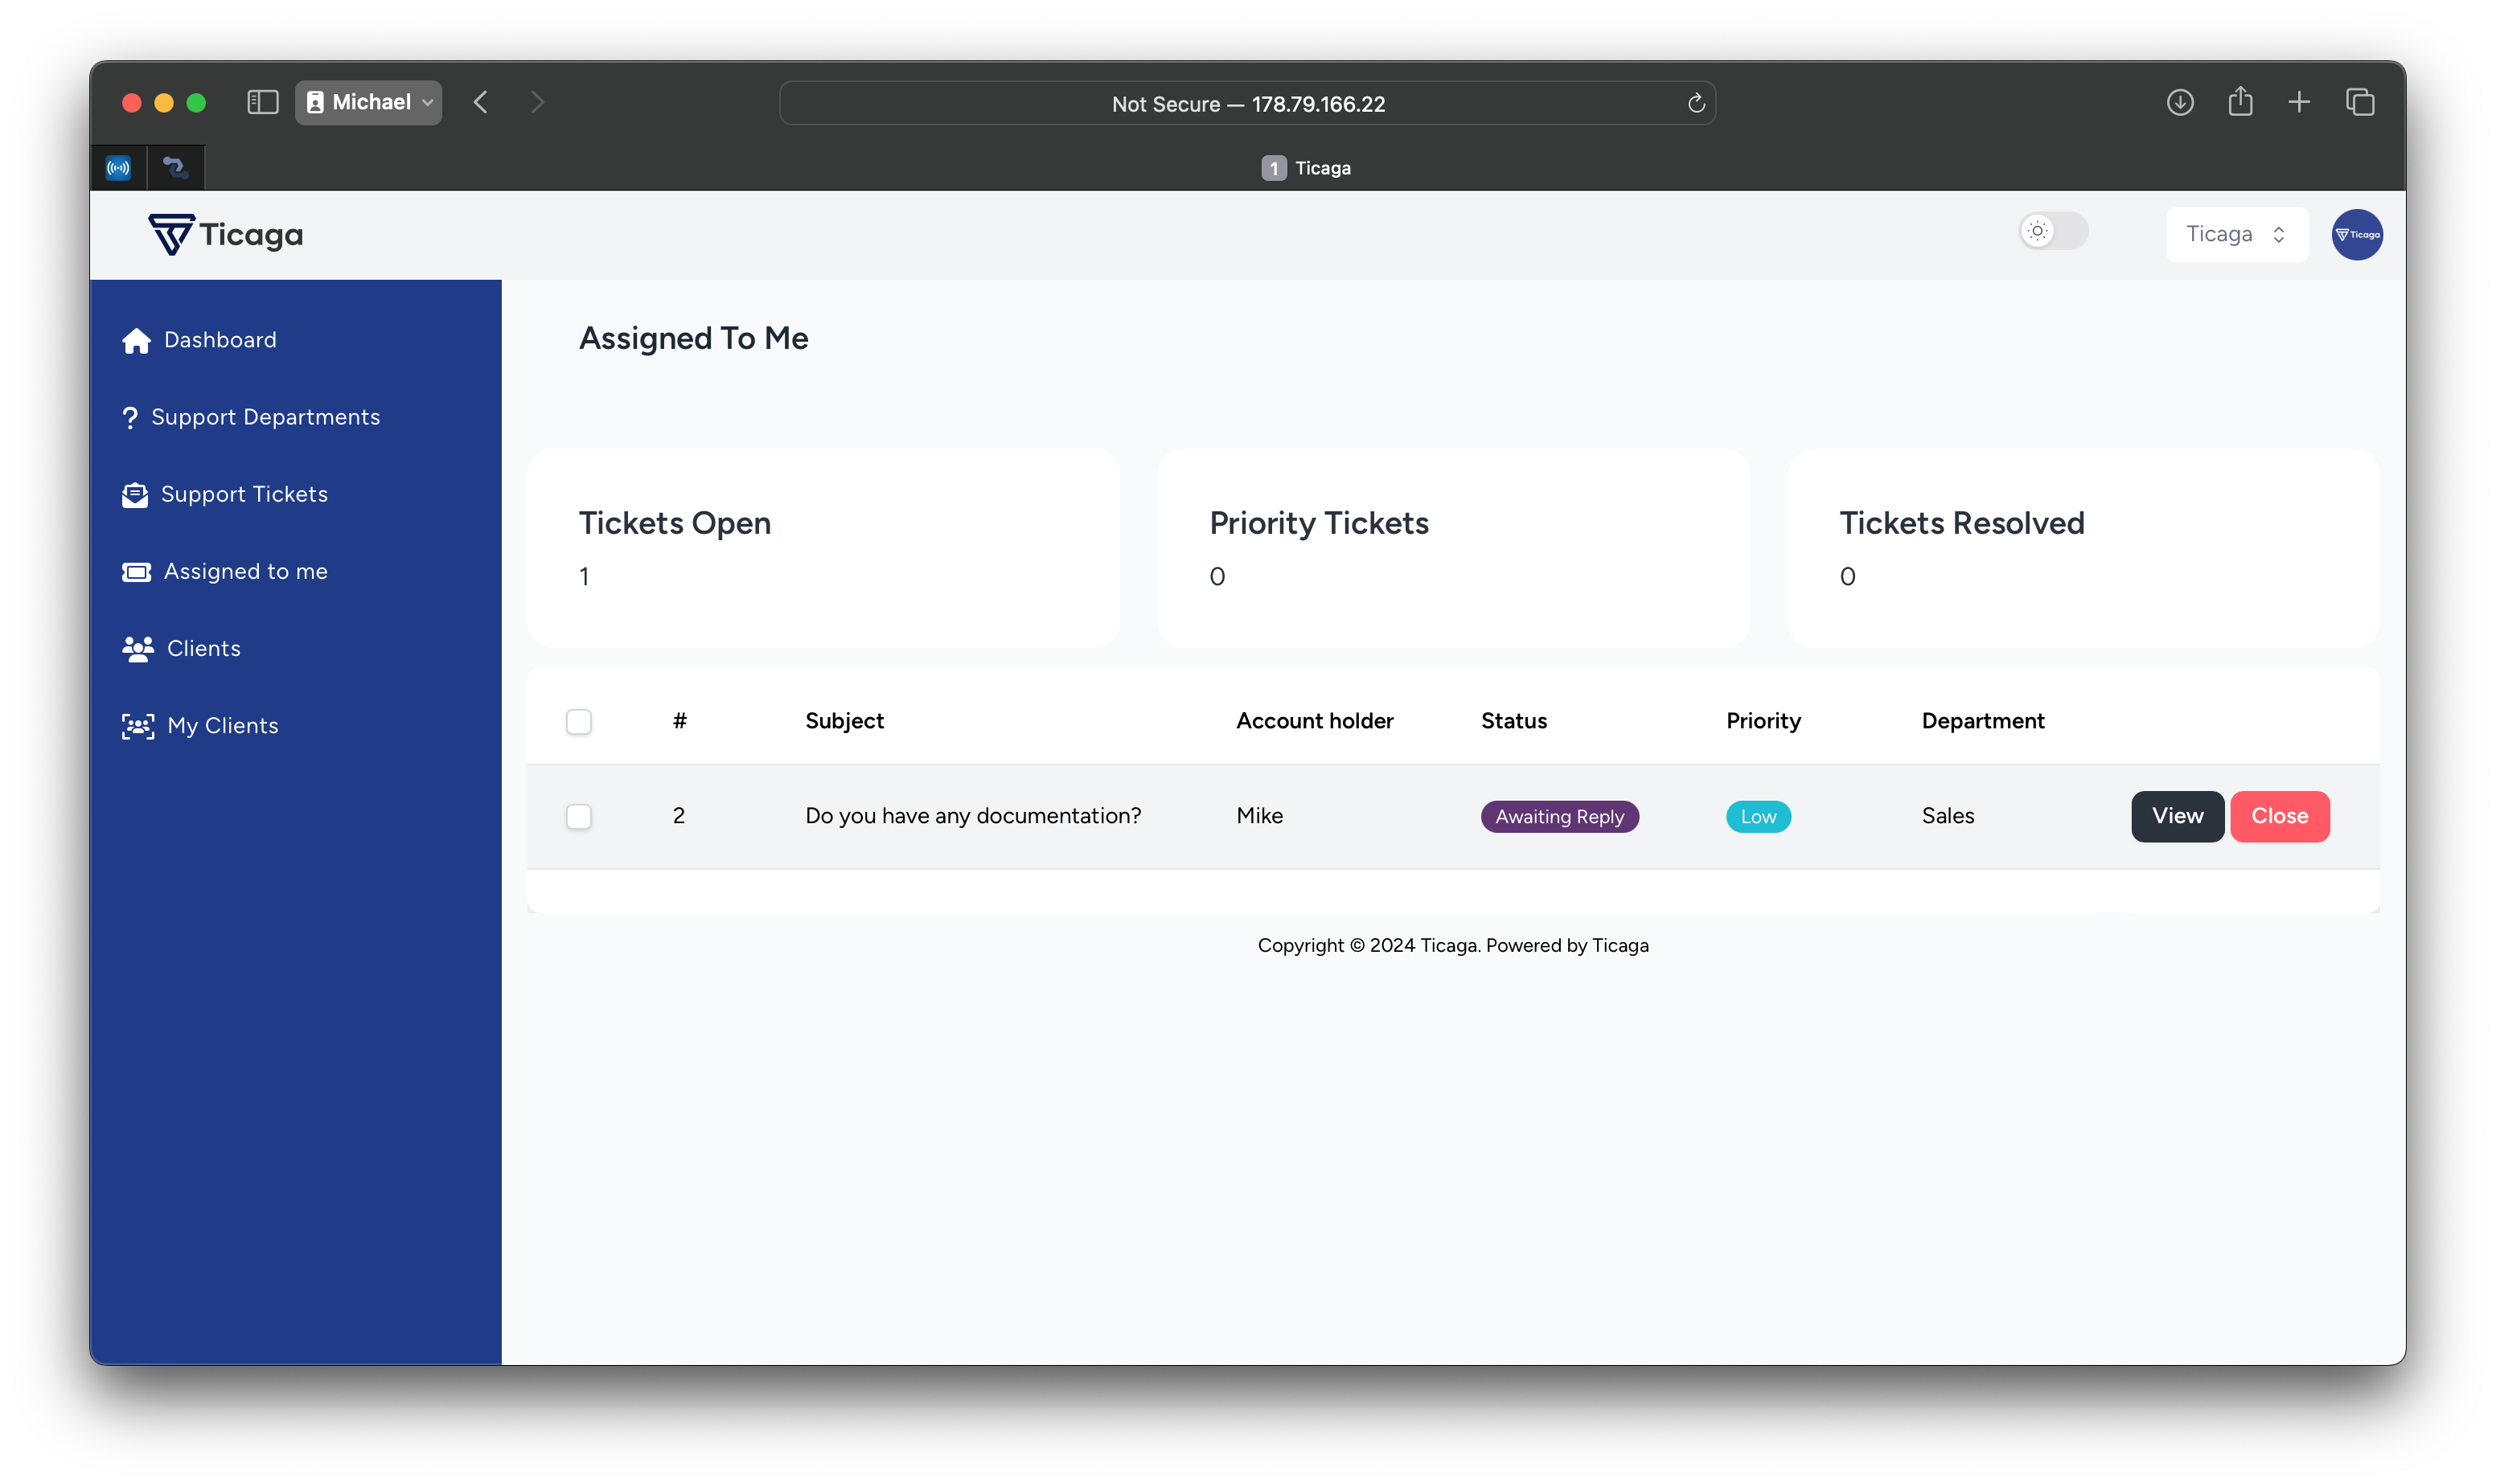
Assigned To Me
Assigned to me section will show you all the tickets which are assigned to you in Ticaga.
Email Piping
Configuration
Ticaga retrieves 10 emails every 2 minutes using a non-overlapping scheduling mechanism. This approach ensures that if an IMAP server experiences delayed response times, subsequent scheduled runs are skipped rather than initiating concurrent jobs. This design prevents excessive CPU load and eliminates the risk of duplicate email processing.
Connect via SSH using the username established during Ticaga installation. Our documentation uses ticaga or demo as example usernames for illustrative purposes. For security best practices, we recommend using a unique username, though the final choice is yours.
sudo su ticagaNow we want to set-up the cronjob for Laravel's scheduler:
export EDITOR=nano;
crontab -e
First we set the editor to nano, this is the basic editor, you can use vi but in our option Nano is better.
Then we edit the crontab.
Paste in the following cronjob:
* * * * * cd /var/www/ticaga && php artisan schedule:run >> /dev/null 2>&1Ctrl + X and Y to save and close the editor.
To check that it's set to run, you can run the following command:
crontab -lIt'll output the above.
Set-up the accounts
This is the important step to pipe into Ticaga, you need to go to:
/config/imap.phpFind:
/*
    |--------------------------------------------------------------------------
    | Available accounts
    |--------------------------------------------------------------------------
    |
    | Please list all IMAP accounts which you are planning to use within the
    | array below.
    |
    */
    'accounts' => [

        'default' => [// account identifier
            'host'  => 'localhost',
            'port'  => 993,
            'protocol'  => 'imap', //might also use imap, [pop3 or nntp (untested)]
            'encryption'    => 'ssl', // Supported: false, 'ssl', 'tls'
            'validate_cert' => true,
            'username' => 'root@example.com',
            'password' => '',
            'authentication' => null,
            'rfc' => 'RFC822', // If you are using iCloud, you might want to set this to 'BODY'
            'proxy' => [
                'socket' => null,
                'request_fulluri' => false,
                'username' => null,
                'password' => null,
            ],
            "timeout" => 30,
            "extensions" => []
        ],
    ],
Please do not modify the default entry, as it is not integrated with Ticaga and serves solely as a reference example. To add your own accounts, insert them immediately above line 31.
        'sales' => [
            'host' => 'mail.yourdomain.com',
            'port' => 993,
            'encryption' => 'ssl',
            'validate_cert' => true,
            'username' => 'sales@yourdomain.com',
            'password' => "your_secret_password",
            'authentication' => 'null',
        ],

        'support' => [
            'host' => 'mail.yourdomain.com',
            'port' => 993,
            'encryption' => 'ssl',
            'validate_cert' => true,
            'username' => 'support@yourdomain.com',
            'password' => "your_secret_password",
            'authentication' => 'null',
        ],
The username must match the department email address, however you can have more than one email pipe into a department.
So the final result looks like:
/*
    |--------------------------------------------------------------------------
    | Available accounts
    |--------------------------------------------------------------------------
    |
    | Please list all IMAP accounts which you are planning to use within the
    | array below.
    |
    */
    'accounts' => [

        'default' => [// account identifier
            'host'  => 'localhost',
            'port'  => 993,
            'protocol'  => 'imap', //might also use imap, [pop3 or nntp (untested)]
            'encryption'    => 'ssl', // Supported: false, 'ssl', 'tls'
            'validate_cert' => true,
            'username' => 'root@example.com',
            'password' => '',
            'authentication' => null,
            'rfc' => 'RFC822', // If you are using iCloud, you might want to set this to 'BODY'
            'proxy' => [
                'socket' => null,
                'request_fulluri' => false,
                'username' => null,
                'password' => null,
            ],
            "timeout" => 30,
            "extensions" => []
        ],

        'sales' => [
            'host' => 'mail.yourdomain.com',
            'port' => 993,
            'encryption' => 'ssl',
            'validate_cert' => true,
            'username' => 'sales@yourdomain.com',
            'password' => "your_secret_password",
            'authentication' => 'null',
        ],

        'support' => [
            'host' => 'mail.yourdomain.com',
            'port' => 993,
            'encryption' => 'ssl',
            'validate_cert' => true,
            'username' => 'support@yourdomain.com',
            'password' => "your_secret_password",
            'authentication' => 'null',
        ],
    ],
And email fetching will automatically start for the configured accounts, Amazing!