Plugin Installation
To install the plugin simply download the plugin from: https://github.com/ticaga/ticaga_blesta
Upload the ticaga_support folder to the plugins folder inside your Blesta installation.
Afterwards head over to the Blesta admin and go to the Settings, click on Plugins, and Available. Hit on Install and you'll be greeted with the following:

Click on Manage to set-up the API:
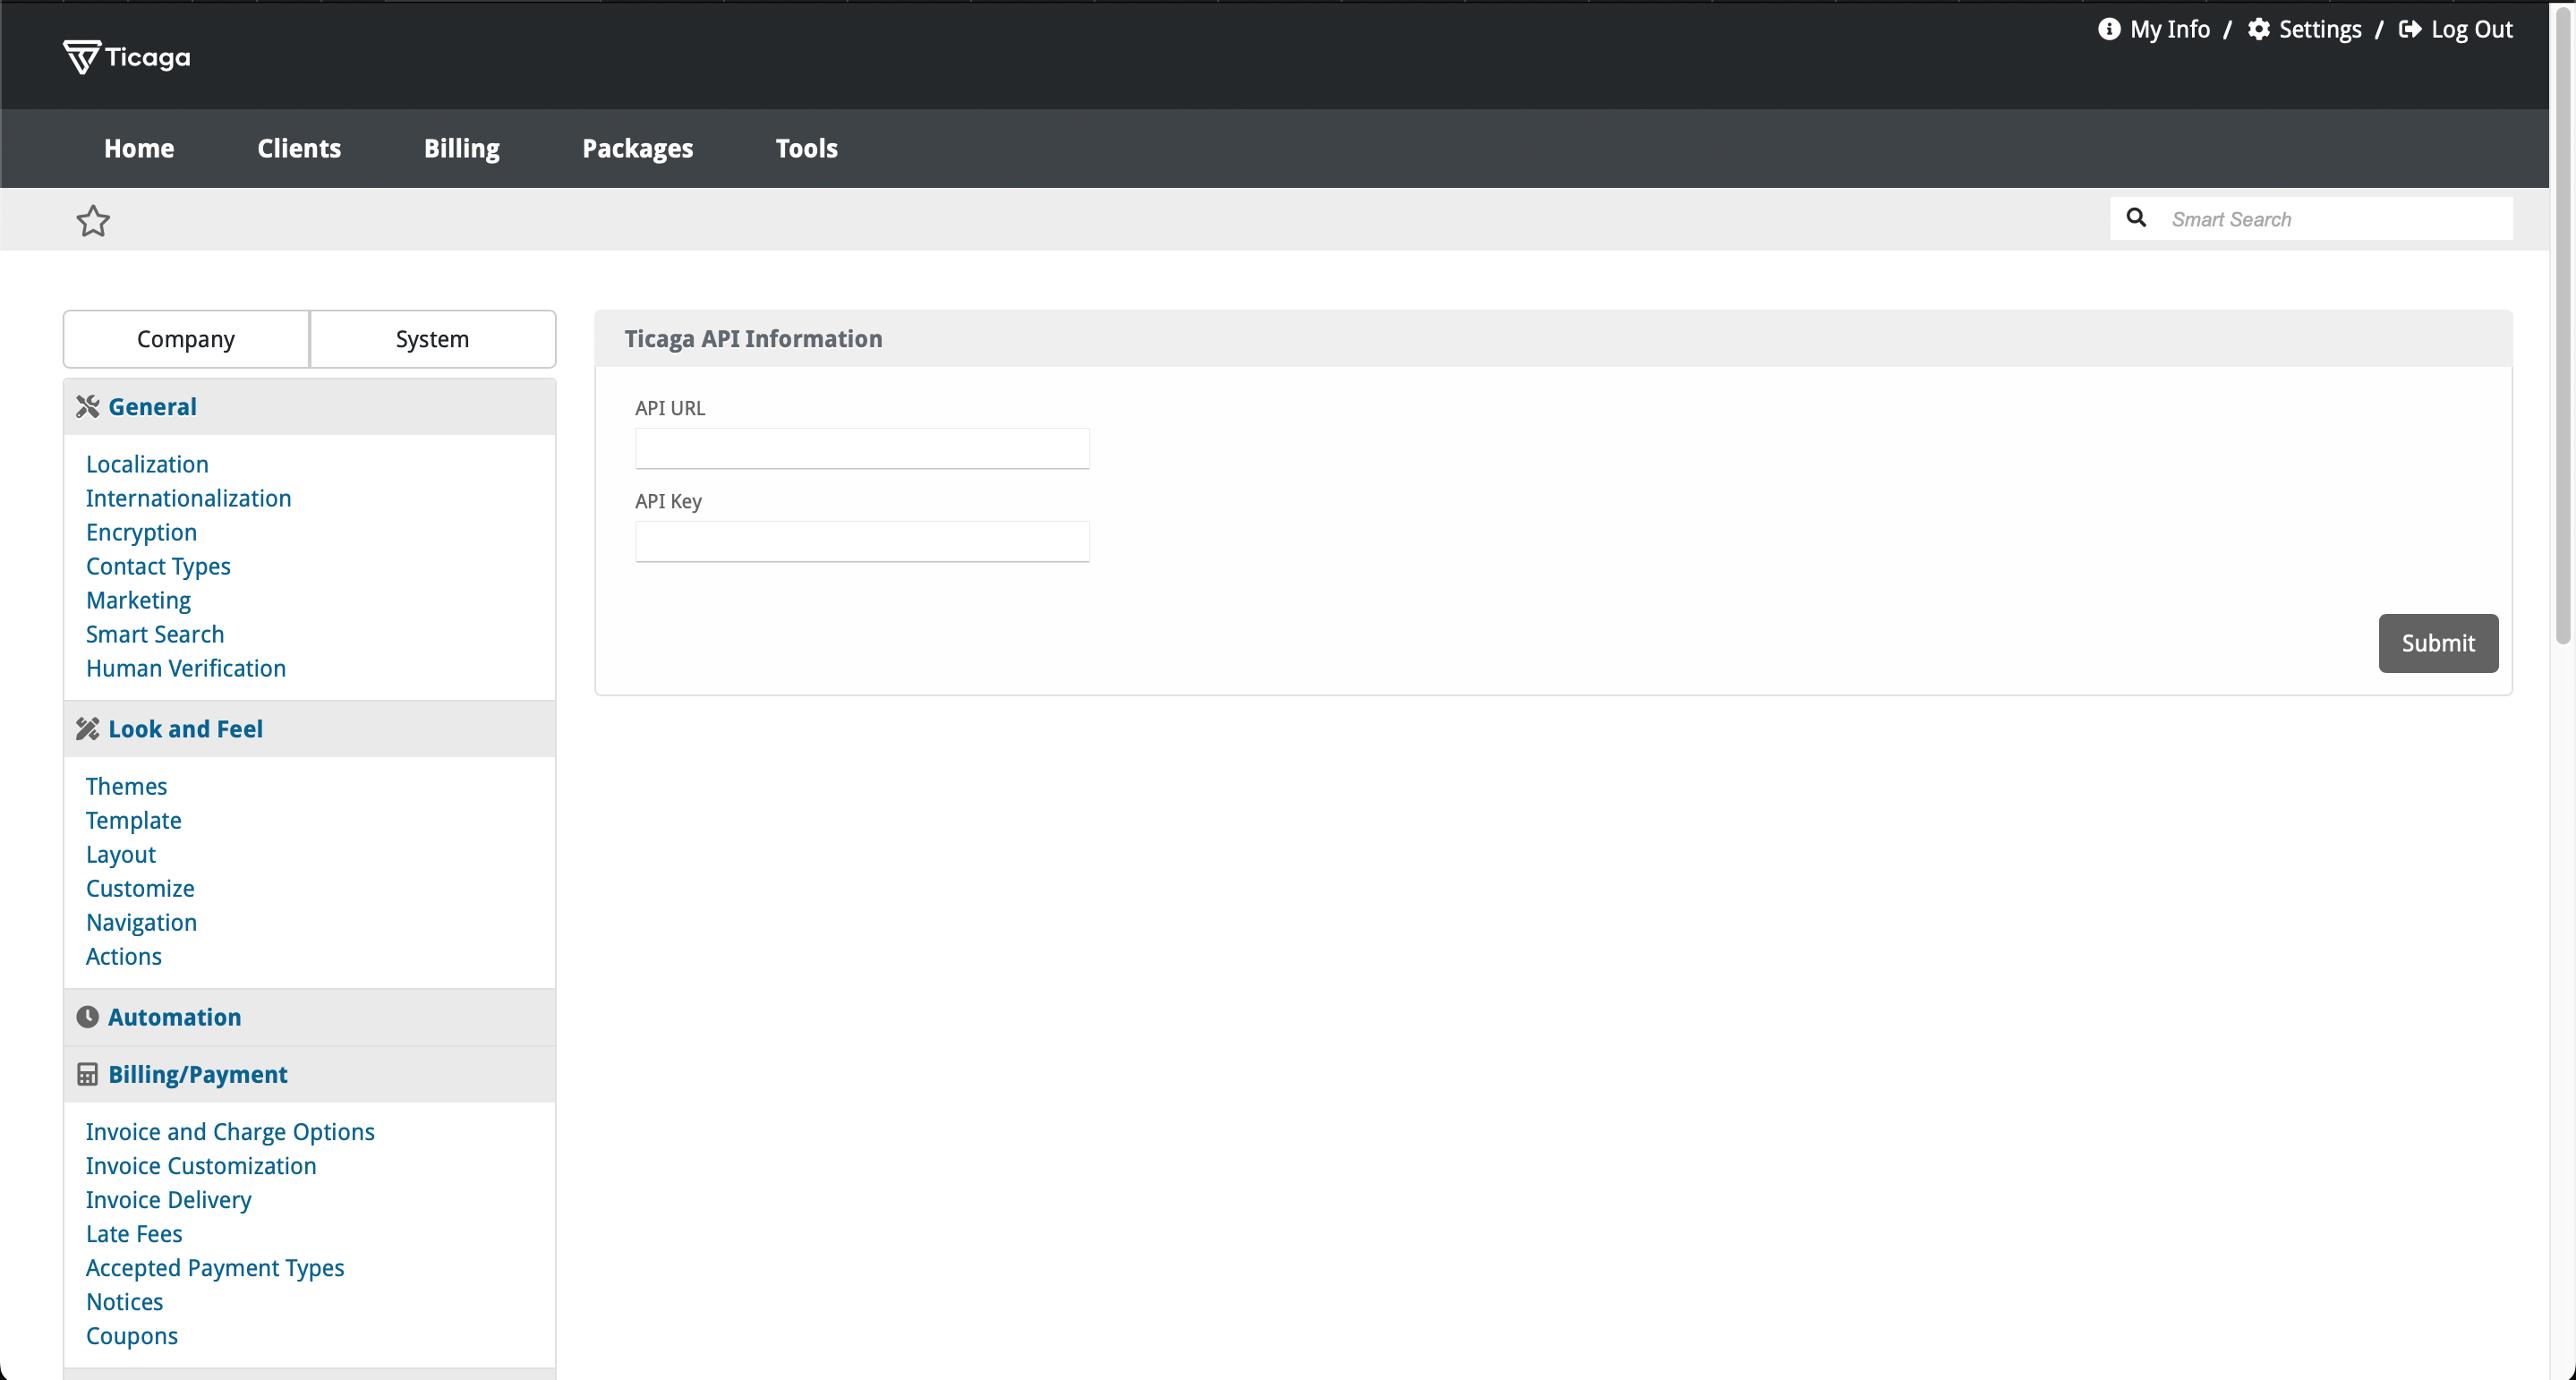
The API URL is your Ticaga installation link, for example https://support.ticaga.com.
The Admin Email Address is your admin email address for Ticaga.
The API Key is the api key you can grab from Ticaga, simply log into your Ticaga installation, click on your name in the bottom left, select on Settings then select API Details.

The Email is your Admin Email Address.
The Token is your API Key.
If you don't have one, click on Create a Token to generate a new one.
Portal Link
Want something like ours:
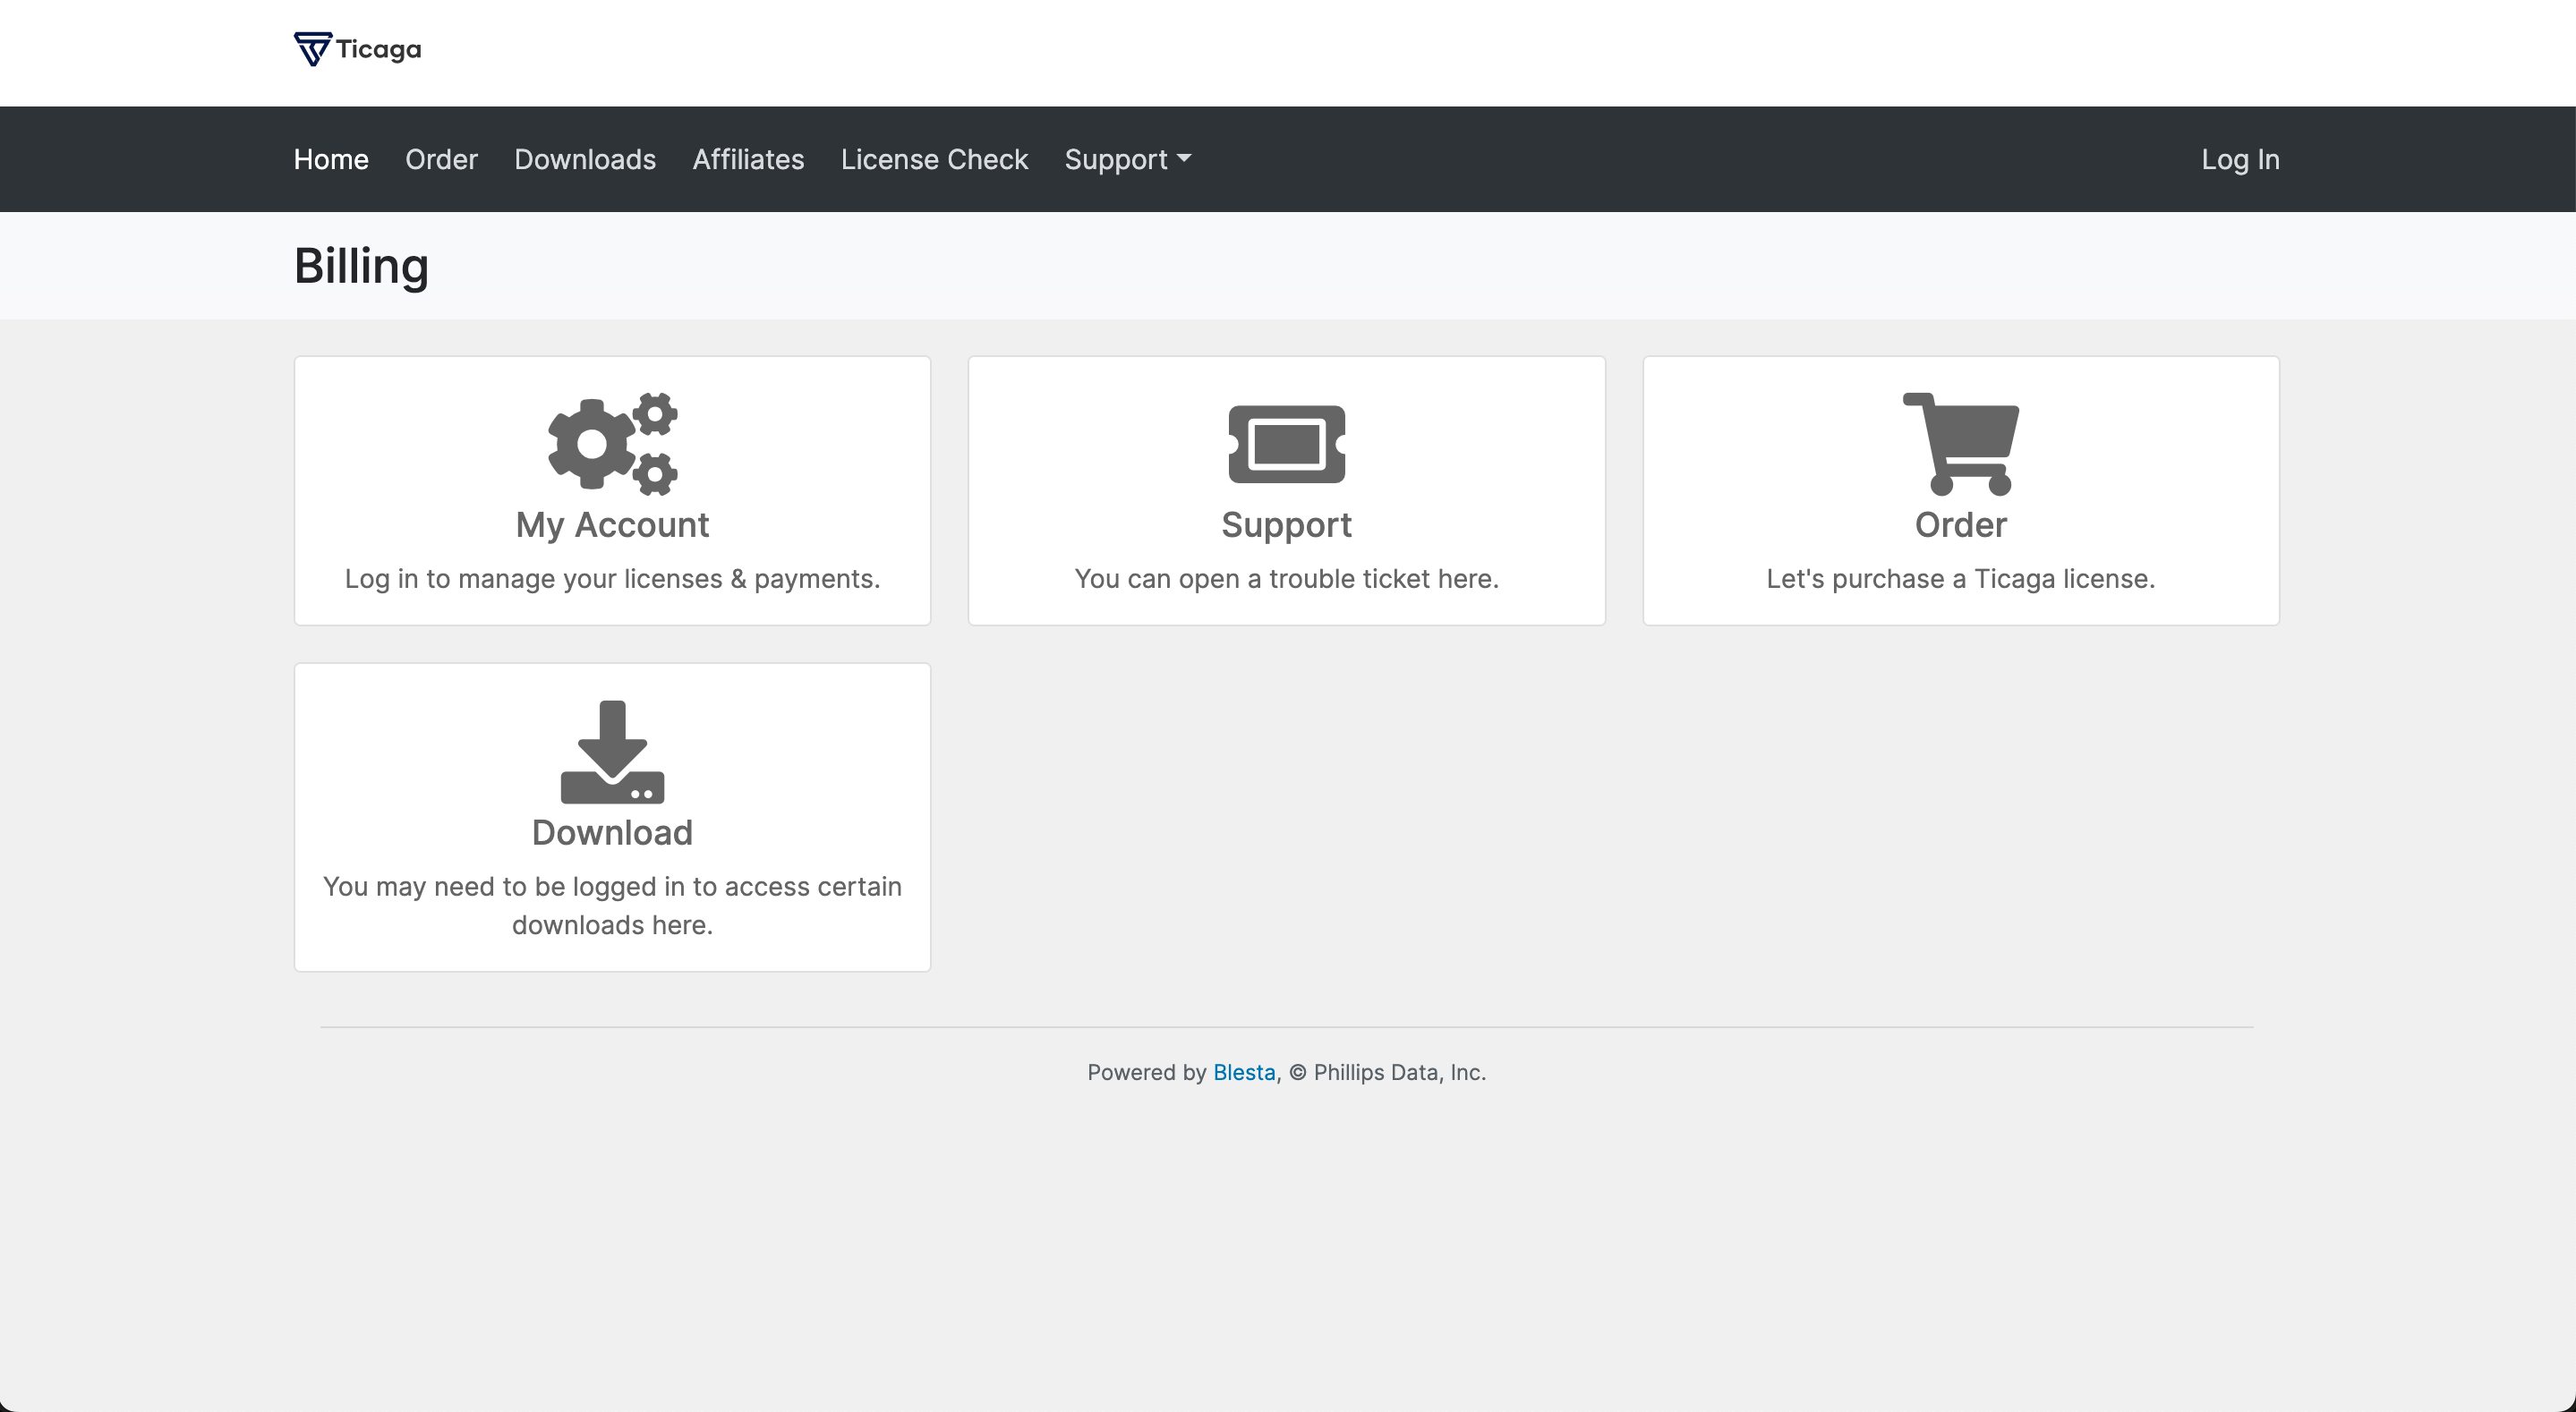
Simply add this to your Portal plugin on Blesta: Settings > Company > Plugins > Portal: manage and add this:
{% if plugins.ticaga_support.enabled %}
    <div class="col-md-4 col-sm-6 portal-box">
        <a href="{blesta_url}plugin/ticaga_support/client_main/departments/">
            <div class="card">
                <div class="card-body">
                    <i class="fas fa-ticket-alt fa-4x"></i>
                    <h4>Support</h4>
                    <p>You can open a trouble ticket here.</p>
                </div>
            </div>
        </a>
    </div>
{% endif %}
No comments to display
No comments to display